Thank you for choosing TrueLook

This guide will quick-start you on the most important tools for your camera and the TrueLook platform. Use the menu to the left to navigate this quick-start guide.


Additionally, bookmark this site. This is our support site and can be your first and fastest stop for any questions you may have in the future.

Support

Ready to close out your project?

Looking to start your next project?

Need help with setup?

Contact us!

Admin Settings

Customer Admins can manage user account options from Settings » User Management:

  • Add Users.
  • Edit User Accounts.
  • Delete Users.
  • Reset Passwords for User Accounts.

Admins can select three roles when adding new users, each with different permissions:

Customer Admin – Total access to all features, cameras, and projects.
Project Admin – Same permissions as a Customer Admin but limited to the Project or Projects they’re assigned to.
Custom User – Limited access (defined by permissions) to specific projects. Some features cannot be granted to Custom User roles.

Sharing Links

Sharing Links allow anyone with the link to view the camera without an account.


An admin must navigate to Settings » Sharing Links » +Sharing Link button.

Sharing Link Button

Security Recordings

TrueLook Cameras record 24/7 and store recordings in 10-minute intervals. Cameras with Essential and Advanced subscriptions have limited days of security recording storage before being overwritten (Premium does not.)

To indefinitely save a security recording:

  • Select Security Recordings from the Live menu.

  • Select the day with the calendar on the left. Security Recordings will show on the right.
  • Click on footage to save it. Click Select Many to select multiple at once.

Time-Lapses

To create a time-lapse: Select Time-Lapse from the Live menu and click the New Time-Lapse button in the top-right corner.

Your camera may already have a default time-lapse set up.
New Time-Lapse button

Live View

On the right side of the camera screen, several options are available.

Universal Options
Start Live View icon

Start/Stop live stream

Normal View icon

Normal/Fit-to-Screen view

Zoom-Icon

Zoom In/Out: Click the bottom-right magnifying glass to open the zoom slider

Take Screenshot icon

Take Snapshot: Save image to your Photo Album.

Camera Options Drawer - Live View

Click and hold to look around

Pan-Tilt-Zoom Camera Options
Preset View icon

Preset Views: Move camera to a saved position.

Navigator icon

Navigator: Camera control panel.

Viewfinder icon

Click and drag in the window. The Camera moves to match that view.

Area Select icon

Area Selection: Click-and-drag on-screen to adjust your view to the space selected.

Logging In

First, log in to TrueLook: app.truelook.cloud.


Your log-in was emailed to you. If you can’t find the email, let our support team know.


Select a camera from the dashboard. Camera options are available from the top Live menu:

  • Live View
  • Time-Lapses
  • Security Recordings
  • and more
Live View Live Menu

Severe Weather

While designed to withstand harsh environments, downtime is possible if the weather is severe enough.  We’ve put together the following weather-based troubleshooting tips to help get your system back up and running as quickly as possible.

Safety Alert!If your area is experiencing high winds, tornados, flooding, lightning, or any other dangerous weather conditions, wait until it is safe to begin troubleshooting.


TopicTroubleshooting
Limited Sunlight/Severe Weather

Cloud coverage can cause a low voltage disconnect, especially after severe weather. The system will need full sunshine to recharge and come back online. Depending on how low the charge is, this may take a day or so after the storm has passed.

Your camera may also go on and offline during this time as it regains sufficient charge levels. You can prevent this by temporarily disconnecting the load to the camera, allowing the battery to charge, and waiting until the voltage has increased before reconnecting it.

Solar Panel Angles

Double-check that your solar panels are facing due south and set to the correct angle for your location. The sun is at a lower angle in the winter months, so non-ideal placement can further decrease efficiency during this time of year.

The installation manual for your solar power system has information that on ideal angles for your location. You can also access solar panel data for all U.S. cities, including optimal seasonal angles, through Solarific.

You’ll also want to double-check that nothing is blocking the sun from your solar panels. Trees, buildings, and other objects that aren’t an issue most of the year could be blocking the sun at its lower winter angle.

Snowfall

Solar panels typically heat up enough on their own to melt snow and ice quickly. The panels are also designed to withstand the weight of snow and ice that can accumulate.

If you are experiencing extended snowstorms and wish to be proactive, a soft brush can help remove the snow faster. Make sure to do this gently, as a rough brush or too much pressure can damage your solar panels. Also, never use harsh chemicals or abrasive materials on the solar panels.

If your solar panels are closer to ground level (such as on a solar skid or mobile trailer), removing the nearby snow from the ground can help prevent the wind from blowing snow back onto your panels.

Maximizing Sunlight Troubleshooting

It is important to ensure your solar panel is appropriately installed: panels facing south, angled for your location, and not under the shadow of other objects. The amount of time a solar panel spends in sunlight greatly affects if it generates enough power.

Keep in mind:

  • During the day, 10% shade coverage can equal up to an 80% power loss.
  • Shade is bad for solar panels. Just because it’s sunny doesn’t mean the panel is receiving sunlight.
  • If you’re not getting enough power during the daytime, it won’t last the night.
Solar trailer orientation
Solar Panel Pole Orientation
  • Ensure your panels are facing to the south to maximize time in the sun.
  • As the sun moves, it may cast shadows over your solar panels from thick foliage, buildings, or the mobile trailer itself.
  • Solar panels are good at naturally removing most snowfall, but use a soft brush if you need to remove any heavy blockage. Using anything harder may damage the panel.
  • Winter months will have less sunlight overall.

Struggling with finding a proper location? Solar panels can be moved up to 100 feet away from solar panel extension cables. Email partorders@truelook.com if this is needed.

The battery box’s load cable can be up to 100 feet in length to power your device. Additionally, if you have a camera cellular control box with a serial # starting with DB-, you can connect with a camera cable up to 300 feet in length.

Panel Angle

Solar Panel angle map. Solar panel key. 35° Panel Angle Zone (Southern U.S.); 45° Panel Angle Zone (Central U.S.); 55° Panel Angle Zone (Northern/Canada-adjacent U.S.)
Solar panel key. 35° Panel Angle Zone (hole 7, Southern U.S.); 45° Panel Angle Zone (hole 6, Central U.S.); 55° Panel Angle Zone (hole 4 Northern/Canada-adjacent U.S.)

In addition to facing your solar panels south, refer to the map below for your location. This will help properly adjust your solar panels for the sun’s angle.

Low-Voltage Disconnect

As with most electronics, a camera may not turn on due to a lack of power.  This may be a Low-Voltage Disconnect, or LVD. These may occur due to weather, shade, or winter daytime hours.


LVD occurs when the battery’s voltage drops below 11.5V and resolves after charging to 12.5V (23V and 25V for 24-volt batteries). When the system is in LVD, devices will not power on to protect your batteries and allow the charge controller to restore batteries to a safe voltage. LVD will clear once the batteries reach 12.5V and devices will power up again. 


Below are troubleshooting steps to narrow down LVD causes. If further help is needed after following the steps, please take a picture of your charge controller with the LVD warning and contact us, as we’ll require it to best assist you.

If light and weather limits power to your solar trailer, you can connect a dedicated power source (e.g. a generator) to the rear panel connector of a mobile trailer.

Charge Controller LVD Warning

TrueLook Control Box Displaying LVD

If there is one with your system, check the charge controller screen in your enclosure box (see illustration on the right). The numbers will instead show LVD.

OnsiteIQ

Add Your Camera to OnsiteIQ

Create Sharing Link for OnsiteIQ

You’ll need to create a Sharing Link from your TrueLook account to copy and paste to OnsiteIQ.

Must be an Account Owner on your OnsiteIQ account.
  • Log in to the TrueLook Platform.
  • Click the Settings icon in the upper right-hand corner and navigate to Sharing Center.
  • Click the Sharing Link button.
  • Name your new sharing link then select your cameras and options.
  • Click Save.
TrueLook Sharing Link List
  • Find your sharing link name in the Links table.
  • Click the dotted menu icon on the same row to the right.
  • Select Copy Link from the dropdown.
One camera can be linked per OnsiteIQ project.

Change the Camera on a OnsiteIQ Project

While only one camera can be linked per OnsiteIQ project, you can create or copy another Sharing Link by following the steps above and replacing the Sharing Link in OnsiteIQ.

Area Selection

Area selection
Area selection zoomed

After clicking the Area Selection button, you be able to click-and-drag to draw a rectangle on-screen. The camera will automatically adjust its view to match the area selected.


This is perfect if you want to aim your camera on any specific spot quickly and accurately, without using direct camera movements.

Solar Data Key

The Solar data you can review is below. The statuses and colors in each info box will note if it’s Stable, or if there are any concerns at the present moment. 

  • Charge Current: Present charge the solar battery is receiving.
  • Battery Temperature: Present temperature of the solar battery.
  • Heatsink Temperature: Present temperature of the electronics’ cooling heatsinks.
  • Load Current: Electrical current drawn by camera(s).
  • Load Power: Wattage consumed by camera(s) (Battery Voltage * Load Amps = Load Watts).
  • Voltage: Electrical potential difference between solar panel and battery.
  • Ambient Temperature: Temperature of the air surrounding the system.
  • Battery Temperature: Internal temperature of the solar battery.
  • Voltage Trends: Displays Voltage amounts over time.
  • Current Flow: Displays Charge and Load (positive and negative) currents over time.
  • Temperature Monitoring: Displays Ambient, Battery, and Heatsink temperatures over time.

Introduction

TrueLook Solar Data

Remotely check in on the status of your solar package on the TrueLook platform. You can view key metrics, including current charge, power, voltage, and temperatures. Additionally, trend charts provide solar data to review and track changes over time.

TrueAI PPE Setup

Live Menu - Time-Lapses highlighted
Time-lapse menu with Allow PPE Detect checked

Once you’ve received the email that your camera is activated for TrueAI PPE, do the following to finish setup, depending on if you have a time-lapse set up or not.

  • Log in to app.truelook.cloud.
  • Open the TrueAI PPE-activated project.
  • Select your camera and go to the Live dropdown from the top menu.
  • Click Time-lapses.

If you already have a time-lapse set up:

  • Click the gray overlay box on the time-lapse.
  • Click the pencil icon → choose Edit Time-lapse.
  • Go to the Set Schedule screen.
  • Confirm your time-lapse is suitable for PPE detection by reviewing the Optimizing Cameras for TrueAI PPE section below.
  • On the Set Schedule screen, check Allow PPE Detection.

If you don’t have a time-lapse set up:

  • Click the green New Time-Lapse button.
  • Follow the steps on the Creating a Time-Lapse page.
  • Confirm your time-lapse is suitable for PPE detection by reviewing the Optimizing Cameras for TrueAI PPE section below.
  • On the Set Schedule screen, check Allow PPE Detection.

Your camera is now monitoring for PPE violations! Within a few hours, you’ll see results in your dashboard!


Access PPE through the TrueAI section via the sparkle icon on the project dashboard or selecting TrueAI from a camera’s dropdown menu. Click the PPE tab to access the TrueAI PPE dashboard.

Optimizing Cameras for TrueAI PPE

TrueAI PPE Job Site

Here’s a checklist of items to optimize TrueAI PPE for your jobsite:

  • Do not use a panoramic time-lapse. 
  • Keep camera closer than a distance of 100 meters (~328 feet).
  • Ensure peoples’ head, torso, and legs are clearly visible.
  • Select a narrower field-of-view over a high-traffic zone.
  • Avoid shadowy, low-light areas and high-glare areas.
  •  If needed, create a new time-lapse specifically for PPE to pull imagery from.
  • Set the PPE time-lapse to 5 minutes a picture.

TrueAI PPE

TrueAI PPE is a separate add-on.It can only be added to cameras with an Advanced or Premium subscription.

TrueAI PPE detects workers who are not wearing personal protective equipment (PPE). This is done by TrueAI PPE reviewing time-lapse images for PPE violations.


To access TrueAI PPE, first access the TrueAI Dashboard, then click on the tab labeled PPE to enter the TrueAI PPE dashboard.

TrueAI PPE Violations Chart

This graph shows the number of PPE violations seen on the jobsite each day. Expand the chart’s timeline with the drop-down menu, and organize chart data with the Filter button.


Mouse over each point to see a breakdown of the day. By clicking a point on the chart, you’ll access the images TrueAI PPE marked as violations for that day.

TrueAI PPE Jobsite With Violation Detections

Boxes will be placed over people within the image at locations where they may be missing specific PPE.


The color of the box will refer to the missing PPE, referenced in the filter box.  These boxes will be paired with a percentage. These percentages represent TrueAI’s confidence in that the PPE is not being worn; that the PPE is missing.


  • Protective headwear (Red): Hard hats.
  • High-visibility upper-body wear (Orange): Brightly colored clothing worn on the torso. This includes high-visibility vests.
  • Safety Vests (Green): A safety vest worn on the torso.
Innacurate PPE Detection

If TrueAI PPE has an incorrect detection, click the Thumbs Down button to submit the error. This sends it back to TrueLook where we use the images to update the system for higher accuracy. 

Inventory

Inventory lists information about the cameras on your cameras, such as the camera name, project it’s on, project’s name, serial number, subscriptions, and more.


Click the clipboard icon in the upper-right of the Dashboard view to access the Inventory. You must have permissions to see and interact with the section.


You can use the search bar to search your inventory, or use the columns to filter and organize the list. Use the Export button to download the list into an Excel format. 

View Bar - Inventory Highlighted
Inventory Page

Group By Serial No/Project

You can group your inventory by Serial Number or Project to easily organize the list.

Inventory group by Serial No. or by Project

Upgrade Camera Subscription Tier

To get a higher tier subscription for your camera, you can click the Upgrade button. This opens up the Upgrade Request Form which will walk through a flow of options before confirming your upgrade.


Fill out the forms and click Submit. This sends it to our team for review. You’ll receive an email when the upgrade is complete.


See Subscription tier information on our Pricing page.

Upgrade Camera selection

Complete Project or Camera

You can choose to complete a project or camera to finalize its subscription. You’ll see a couple confirmation windows.


The first warns you about all subscriptions and services ending immediately, and the second reviews your project or camera information. Ensure it is correct and click Submit to complete the project or camera.


You’ll receive an email confirmation with the project’s information. Your subscription will be stopped immediately.

Complete Camera selection

Reactivate

You can Reactivate any Completed cameras to use on another project.


Fill out the form and it will be submitted to TrueLook. You’ll be notified once your camera is reactivated.


See After The Project for detailed instructions and video walkthrough.

Inventory Menu - Reactivate

TrueLook Mobile App

Samsung Device Won't Run Mobile App

If you’re on a Samsung device, you may have issues while running the TrueLook app. The issue may be caused by the Samsung browser and you may need to set your device to use a different default web browser.


Here’s how to do it: 

  • Open the Settings on your device.
  • Access the Settings’ Apps section.
  • Under General, select Default apps.
  • Select Browser and select a different browser (Google Chrome is recommended)
  • Restart the TrueLook app.

If this doesn’t fix your issue, please contact us.

Auto Fetch Security Recordings

Auto Fetch Security Recording window and calendar

If you have a project that calls for comprehensive documentation, Auto-Fetch Security Recordings is an add-on that ensures all your captured footage is automatically saved to your account. 


Normally, security footage is saved for 90 days at most, unless you manually it. Auto-Fetch Security Recordings automatically saves your footage, giving you a complete archive of your jobsite. 


Once the project ends, footage is stored for three years or indefinitely, depending on the camera’s subscription tier. 


Once Auto Fetch is set up for your account, it requires no further input from youYou can play your saved Security Recordings as you normally would on the TrueLook platform.


Contact us for more information.

24×7 Rotating Stream

24×7 Rotating Stream cycles through your cameras’ live views, providing real-time footage from each jobsite. It runs uninterrupted, so you can leave the stream on all day for websites, social media, or offices.


It’ll switch between cameras added to the rotation, so adjust as necessary to provide the best possible show.


Access 24×7 Rotating Streams from the top-right gear icon. Select Sharing Center, and then Live Streams from the upper-left tabs.

You must have administrator permissions to access the sharing center. If you’re unable to access the sharing center, contact your account administrator.

Create a 24x7 Rotating Stream

To start, click the Live Stream button when under the Live Streams tab. This brings up the Create 24×7 Rotating Stream window, where you can edit the options on your 24×7 Rotating Stream.

24x7 Rotating Stream window

Configure the options of your Recent Image Slideshow on the left side of the window.


  • Slideshow Name: The name for the slideshow.
  • Billing Project: The project the stream link is attached to. Once the selected project ends, the stream link is deactivated and needs to be swapped to another project.
  • Start/End hour: Choose the hours of the day the slideshow can be accessed.
  •  Day of week: Choose the days the slideshow can be accessed.
  • Select layout type: Layout of how the camera(s) appear to a viewer.
  • Misc. Options:
    • Full Screen: Slideshow will automatically take the full size of the browser screen.
    • Show project name: Shows project name on the slideshow.
    • Show camera name: Shows the camera’s name on the slideshow.
    • Show Project Location: Shows the city and state from the camera’s address.
Live Slideshow Configuration
  • Set Expiration: Choose a day for slideshow link to expire. Note that it’ll expire at 11:59 PM Eastern Time the day of expiration. 
  • Stream Timer: Amount of time before the slideshow changes.
  • Optional Password: Require a visitor to enter a password to access the slideshow.
  • Enable recent image slideshow link: Makes the slideshow accessible or inaccessible.
  • Optional Logo: Can select a logo image that’ll be included in the slideshow.
Live Slideshow Media Source

On the right side of the window, you can search for your camera(s) to include in the rotation:

  • You can search for a project or camera by entering at least three characters in the Search bar.
  • Projects are listed alphabetically under the Media Source header.
    • You can use the upward/downward arrows to expand the project row to access cameras per project
    • Below the project rows are the applicable cameras. Click the checkbox next to each camera to select it.
When there is no media available,an icon will appear with one of the following explanations: “No media,” “No time lapses,” or “No photo albums.”
Live Slideshow Slides

As you select camera(s), they will appear in the Slideshow Cards section at the bottom of the window.


Remove media from the slideshow by clicking the trash can icon. Rearrange the slideshow with the “Rearrange Slides” button.


Arrows will appear on the left and right side of the Slideshow Cards section to navigate between the selected media.

24x7 Rotating Stream Created confirmation

When finished, click Save.


The following confirmation message will display, and the slideshow link is created.

New Slideshow Listing

When a new slideshow link is created, a blue dot will appear next to the new Slideshow Link for visibility amongst other links on the table.

Only one 24x7 Rotating Stream link can be active at any given time. If more than one live stream slideshow link is needed, contact support@truelook.com. You can have as many 24x7 Rotating Streams as you want.

Ellipses Options

Slideshow Availability Toggle On-Off

You can disable or enable access for a link by using the toggle option in the Available column.

24x7 Rotating Stream Inactive confirmation

When you disable access for a slideshow link by using the toggle option, the toggle will appear in the grey state and a confirmation message displays.

24x7 Rotating Stream Link Active confirmation

When you activate access for a slideshow link by using the toggle option, the toggle will appear in the green state and a confirmation message displays.

Menu Options

24x7 Rotating Stream Ellipses window

Click the ellipses menu from the Recent Image Slideshow table and view the options: Edit, Copy Link, Embed Code, Duplicate, and Delete.

24x7 Rotating Stream window

To edit an existing link, click Edit and the Edit 24×7 Rotating Stream window will open.


You can make any changes, then click Save once finished. When you save the edits, a confirmation message will appear.

24x7 Rotating Stream Link Copied confirmation

You can copy a link to send to intended visitors.


When you click Copy Link, a confirmation message will appear when the link has been copied to your clipboard.

Embed Code Window

You can embed your slideshow into your website to share the camera with visitors.


Clicking Embed Code opens a window to copy the embed HTML code.


Click the Copy button to copy the displayed HTML code to your clipboard. Then, provide the HTML code to your web developer to add to your website.

The code will work as long as the sharing link is active. If the sharing link is deleted, disabled, or expired, your embed code will no longer work.

Introduction

Add-Ons are premium features and services TrueLook offers.


All TrueLook add-ons can be found on the TrueLook Pricing page.

Camera Settings

Use the Camera Settings page to manage all your cameras.

Using the vertical ellipsis menus, you can:

  • Rename Camera: Change the camera name.
  • Digital Wiper: Clears off rain droplets obscuring the camera lens view.
    • Note: Certain PTZ (pan-tilt-zoom) cameras only.
  • Refresh Viewfinder: Takes a series of images from the full field of view to create the Viewfinder image you see on the live view page.
    • Note: Certain PTZ (pan-tilt-zoom) cameras only.
  • Focus: Refocuses a camera that may be out of focus.

With the remaining options and toggles, you can:

  • Enable/Disable Access: Allow/Restrict non-admin users’ access to the camera from the dashboard.
  • Offline Alerts: System sends emails to admins when the camera is offline and no longer capturing images.
  • Sharing Links: Links go directly to the camera interface, bypassing the login requirement.
  • Default View: Allows you to decide which view is shown by default on Live View.
  • Intelligent Security: Allows administrators to configure notifications for Motion Alerts via email, SMS, or both.
Camera Settings Page
Camera Settings page

Rename Camera

Find the camera you want to rename and from the camera panel, click Vertical Ellipses → Rename.


Enter the new camera name and click Save. The new name will be displayed anywhere the camera is shown.

Vertical ellipses drop down menu Rename highlighted

Skyscraper Mode

Skyscraper mode is a way to capture taller, high-rise buildings. Follow the steps below to properly turn and activate your camera.

Skyscraper mode is only available for 4K IR Fixed cameras.

Step 1: Rotate your camera lens

Loosen the screw in the camera neck. This will allow you to swivel the camera in any direction.

TrueLook Camera Swivel Diagram

Rotate the camera lens 90 degrees so that the two sensors are stacked vertically above one another.


Retighten the screw on the camera’s neck. This will lock the camera’s position into place.

TrueLook Camera 90-Degree Rotation

Optional: The sunshield on the camera can be moved to the new top of the camera. This is not required, but recommended.


Pull on the tab facing the base of the camera to remove the shield. Slide the front of the shield into the grooves found along the sides of the camera. It should lock in with a click and can be pressed down to fully secure the shield.


If the shield is loose, it did not lock in properly. Remove the shield and try sliding it in again.

TrueLook Camera Sunshield Removal
Sunshield Replacement GIF

Step 2: Contact TrueLook

Contact TrueLook to change the camera settings to Skyscraper Mode. Our team will adjust the camera to show the footage correctly in your dashboard.


Once our team confirms that skyscraper mode has been enabled, we recommend logging into the TrueLook Platform to check the live view of your camera to ensure that the camera is angled the way you’d like and captures the entire project.


Congratulations! Your camera now gets the perfect views of your highest reaching projects.

Returning your camera to a landscape view is similar to the steps above.

  • Loosen the screw on the camera’s neck. Rotate your camera 90 degrees so that the sensors are to the left and right of the camera lens.
  • Contact TrueLook to request the update to your camera view.

Digital Wiper

The Digital Wiper option will only appear if your PTZ camera has this feature. The digital wiper allows you to clear off rain droplets that may be obscuring the view of the camera lens. When the digital wiper has been initiated, you will see what appears to be a shaking movement. This is the camera quickly shaking to “wipe” the water off. The shaking movement only lasts for a few seconds.


Find the camerayou want to wipe off (clear) and from the camera panel, click Vertical Ellipses → Digital Wiper.

Vertical ellipses drop down menu

Refresh Viewfinder

PTZ (Pan-Tilt-Zoom) cameras take a series of images from the full field of view to create the Viewfinder image you see on the live view page. This set of images sometimes needs to be retaken.


Find the camera you want to refresh the viewfinder for and from the camera panel, click Vertical Ellipses → Refresh Viewfinder.

Vertical ellipses drop down menu Refresh Viewfinder highlighted

Focus

This option lets you refocus a camera that may be out of focus.


Find the camera you want to focus and from the camera panel, click Vertical Ellipses → Focus for that camera.


A confirmation message displays and the refocus camera request is sent.

Vertical ellipses drop down menu Focus highlighted

Disable Access

If needed, admin users can disable all access to a camera. This will not affect other projects or cameras.

If disable access is toggled on,only admin users will be able to access the camera from the dashboard. The camera will still capture time-lapse images, if configured, as well as security recordings. No other users will be able to view the camera or any saved images from the camera.

Find the camera for which you want to disable access and, from the camera panel, click the Disable Access toggle. The following confirmation message displays and camera access is disabled. Enable by clicking the toggle once again.

Access Disabled notification
Access Enabled notification

Alerts

A camera may occasionally go offline. You can set up the Alerts options, so admins will automatically be notified by email alert if the camera goes offline and is no longer capturing images. Note that if you do not have any active time-lapses, the alerts will not function.

If the Account admin is unable to solve the issue,email TrueLook support at support@truelook.com.

Find the camera you want to set up offline camera alerts for. From the camera panel, click the Alerts toggle.


An Edit button will appear and is now enabled. Click Edit and the Alerts window will display with editable options for specific situations.

Offline Alerts

  • If the camera is offline, send an initial alert after: Choose time period from the drop-down before the system sends its first alert.
  • If the camera continues to be offline, send an additional alert every: Choose time period from the drop-down for the frequency the alerts send.

Missing Time-Lapse Images

  • If a running Time Lapse has not taken an image, send an initial alert after: Choose time period from the drop-down before the system sends its first alert.
  • If a running Time Lapse continues not to take an image, send an additional alert every: Choose time period from the drop-down for the frequency the alerts send.

When finished, click Save Changes. The following confirmation message displays and the offline alert is enabled.

Camera Settings Alert Toggle
Alerts window

Intelligent Security

All TrueLook cameras record security video footage 24/7 and detect when motion is captured by the camera. Admins can set up custom motion alert notifications via email, SMS, or both to be sent to anyone who needs to know about detected motion.


Typically, this is to alert you to activity that is not supposed to be happening. Like someone on the jobsite at night when nobody is working.


We recommend setting motion alert windows for times there should be no activity on the jobsite. E.g. weekdays would likely be between the hours of 5:00 PM and 7:00 AM, times when employees go home and when employees show up to work the next day.

Motion Alerts toggle
Fence Guard and Motion Guard are only available on select camera models.Please reach out to support@truelook.com and we will adjust the settings for you.

Click Edit. The Motion Alerts window displays. Enter/select the following information:

  • Alert me by: Select email and/or MMS (text messages) to select how you receive your alerts.
  • Frequency: Choose time period. This determines how frequently you will receive motion alerts (e.g., 15, 30 mins., 1 or 2 hours, etc.).
 If frequency is set to every 30 minutes:After the first alert is sent, another alert is sent for any activity after 30 minutes has passed. We recommend starting low and adjusting afterward.
  • Weekday schedule and weekend schedule: Set schedule type you want to receive motion alerts for during the week and weekend (e.g., Never, Continuously, Between certain hours).
If "Continuously" is selected, you will receive motion alerts 24/7 when any motion is detected. If "Between Certain Hours" is selected, you must enter the beginning and ending hours.
Motion Alerts window

When finished, click Save Changes.

Introduction

The Camera Settings page allows administrators to configure different settings for each camera. It can be found by clicking Settings (the gear icon) in the upper right corner of the dashboard and selecting Camera Settings.

Camera Settings Menu Selection

Raken

Add Your Camera to Raken

TrueLook Sharing Link Window
Must have an active Raken Professional, Performance, or Enterprise subscription
  • Log in to the TrueLook Platform.
  • Click the Settings icon in the upper right-hand corner and navigate to Sharing Center.
  • Click the Sharing Link button.
  • Name your new sharing link then select your cameras and options.
  • Click Save.
TrueLook Sharing Link List
  • Find your sharing link name in the Links table.
  • Click the dotted menu icon on the same row to the right.
  • Select Copy Link from the dropdown.
Raken TrueLook Tile
Raken Orange Connect Button
  • Log in to Raken.
  • Click on the Company icon, then click on the Integrations tab.
  • Click on the tile for TrueLook to open the integration settings and click on it.
  • Click Settings.
  • Under Project TrueLook sources: Select a Raken project and then paste your copied sharing link from TrueLook.
  • Click Save.
One camera can be linked per Raken project.
Raken Dashboard with TrueLook Camera
  • Once saved, you can view the TrueLook Camera from your Raken account project.
    • Click the Projects button at the top of the page.
    • Select the project the camera was linked to.
    • Click Dashboard -> Live views

Change the Camera on a Raken Project

Raken Remove Camera
Raken Remove Camera Menu

While only one camera can be linked per Raken project, you can follow the steps below to change which camera is linked.


After logging in to Raken and entering the TrueLook settings page from the integrations tab.


  • Under Project TrueLook sources: Find the project you want to change the camera on.
  • At the bottom of this Settings page, you can delete any project-camera links.
  • Delete the project-camera link, and it’ll allow you to add a new sharing link to the project that was freed up.

Leasing Resources

Leasing with TrueLook

When you lease with TrueLook, you get unlimited access to our dedicated support team. If you have questions regarding your lease term, how to return equipment, or anything else, please email leasing@truelook.com.

Cameras

Select camera systems have multiple models with unique parts. If your control box has four inputs on the bottom, use the “current model” manual and return guide.

Security Solutions

Select camera systems have multiple models with unique parts. If your control box has four inputs on the bottom, use the “current model” manual and return guide.

Solar Power

Our professional installation teams are able to prepare and return your solar equipment for you. For pricing, email leasing@truelook.com.

Solar Package

1 Panel Model

Mobile Surveillance Trailer

3 or 5 Panel Model

Mobile Surveillance Trailer

4 Panel Model

Additional Resources

Camera Placement Agreement

This document may help you get permission to mount your camera on someone else’s structure or property.

TrueLook Mobile App

We have an app for that! No really. Our mobile application can be downloaded from the Apple or Google play store and provides a quicker way to access the TrueLook Platform on the go.

Frequently Asked Questions​

How can I extend my leasing term? Reach out to your Account Executive to let them know, and they will give you pricing information based on your lease type.


How can I get help with my leased equipment? For assistance with returning equipment, contact leasing@truelook.com. For all other questions, email support@truelook.com or call 833.878.3566, Option 2.


What do I do if I lost packaging required for equipment return? If you lost packaging required for equipment return, contact leasing@truelook.com for assistance on returning your equipment.


What if I want someone to prepare and return my solar package or trailer for me? TrueLook offers the option to have a professional installer prepare and ship solar equipment on your behalf at the end of your lease term. Please reach out to leasing@truelook.com for pricing.

Installation Resources

Our goal is to make setup quick and easy.

We’ve created a library of resources to help with everything from installing our hardware to getting started on our platform. If you have questions or run into any challenges, our support team is always available to help, as well.

Cameras and Security Solutions

Exterior Cameras w/ Control Box

2K IR Fixed Camera

Interior Multi-Camera

Solar Power

Solar Package (400W Solar Kit)

Third Solar Panel (200W Solar Kit)

Solar Package (60W Solar Kit)

1 Panel Model

Mobile Surveillance Trailer

3-5 Panel Model
TrueShield Mobile Trailer

Mobile Surveillance Trailer

4 Panel Model

Other

5′ Non-Penetrating Pole Mount

10′ Non-Penetrating Pole Mount

30′ Non-Penetrating Pole Mount

Power Converter

Solar Adapter Cables

Don’t see the
manual for your
system?

Looking for return instructions for
leased cameras?

Additional Resources

Camera Placement Agreement

This document may help you get permission to mount your camera on someone else’s structure or property.

TrueLook Mobile App

We have an app for that! No really. Our mobile application can be downloaded from the Apple or Google play store and provides a quicker way to access the TrueLook Platform on the go.

Editing Email Updates

Email Updates menu
Edit Email Updates window

To edit any email updates after it’s been created, find the project and email you wish to make changes to. Click the vertical ellipses under the Actions column, then select Edit


This opens up a window with the email update’s information to edit. 


Click Save to save changes, or Cancel to discard changes.

Download Image

Download Window

To download an image from the TrueLook platform, click on the “Share” button, and then click on “Download.”

The download window will pop up, allowing you to add information about the image:

  • Project Name
  • Project’s Address
  • Timestamp

Once you have made your selections, click “Download” at the bottom.

After the project

When your project comes to a close, or want to reuse your camera on a new project, we kindly request that you contact us.


There are two ways to reactivate your camera: Online self-service via the TrueLook Shop, or Contact Us.


Either process is essential for both accurate billing and maintaining separation of your projects within TrueLook. It ensures that images from different projects won’t get mixed together, preserving the integrity of your data. We want to assure you that your projects and all associated media will always remain accessible within TrueLook, even if your camera goes offline.


Whether you’ve been with us for years or just starting, you will retain continuous access to your account for up to three years and can log in at any time. Moreover, you have the flexibility to view or export project media as per your requirements whenever needed.


If you have any questions or need further assistance, please don’t hesitate to reach out to our support team. We are here to provide ongoing support and ensure your TrueLook experience is seamless and hassle-free.


Thank you for choosing TrueLook for your project needs.

TrueLook Shop (Online Camera Reactivation)

To reactivate your camera online, follow the video or instructions below.

If you want to reactivate a camera from a completed project yourself, you can use the TrueLook Shop.

From the Dashboard, navigate to your completed cameras in one of three ways.

  • Click the Completed tab from your dashboard.
  • Visit the Inventory window by clicking the clipboard from your dashboard view buttons.
  • Navigate to the Settings gear, then select Camera Settings.

Under each page tab, find the camera you want to reactivate and click Reactivate

Your Reactivate option may be found in a camera's menu via the kebab icon.

The TrueLook Shop will open in a new window. Log in or create an account, then your selected camera’s serial number will be automatically filled in the serial number box of the reactivation form.

Completed Camera Tab With Reactivation
A TrueLook Shop login is required to reactivate a camera.The TrueLook Shop account is a unique and separate account from your TrueLook Platform account to view your projects and cameras.

Fill out the Project and Billing information on the form. Click Add to Cart when complete.


On the next screen, you can select to Go to Cart, or do further shopping and access the cart from the upper-right corner later.

Once in the Cart, review your order details and select Checkout when ready.


Add your contact and payment information. Select Place Order, and you’ll get a confirmation screen with your order details.


A confirmation email will be sent to your inbox within a few minutes after placing the order.

To receive an invoiceselect Purchase Order then type "NA" in the text box. You'll receive an invoice to your email instead.

Contact Us

Please get in touch with your dedicated sales representative or reach out to our support team at support@truelook.com.

Frequently Asked Questions After Ending a Project

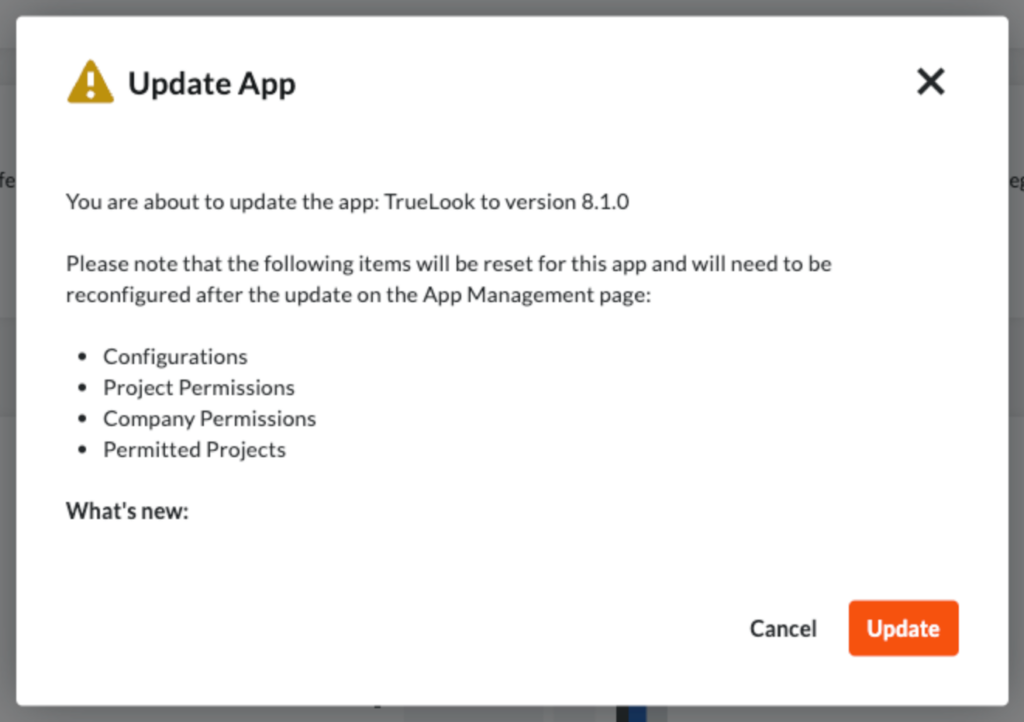
How do I reactivate a camera for the next project?

You have one of two options:

  1. Use the TrueLook Shop to reactivate the camera yourself. Check out the Online Reactivation guide above!
  2. Contact us when you’re ready to reactivate.

How do I view media from past projects?

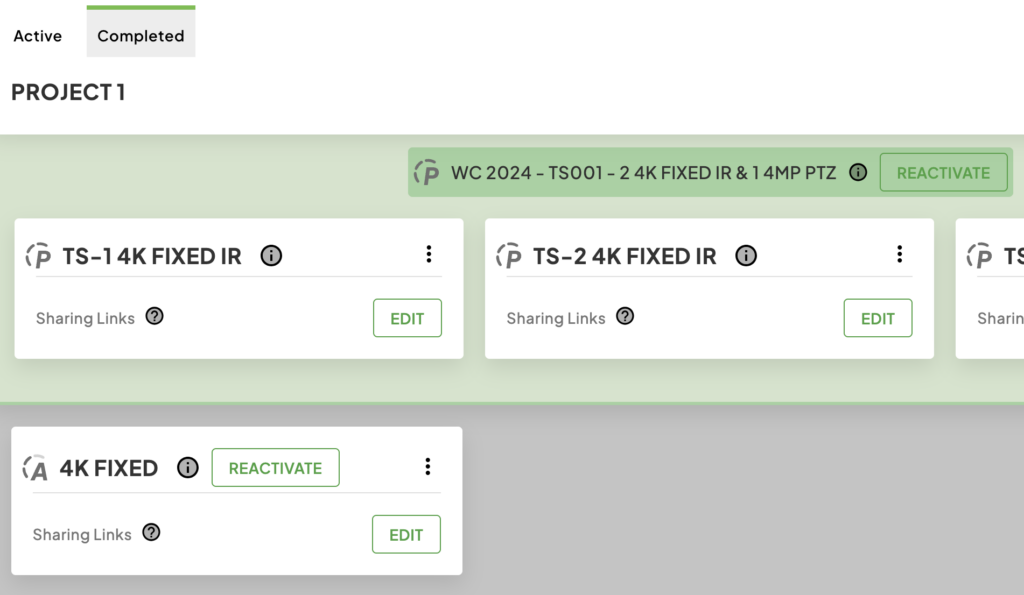
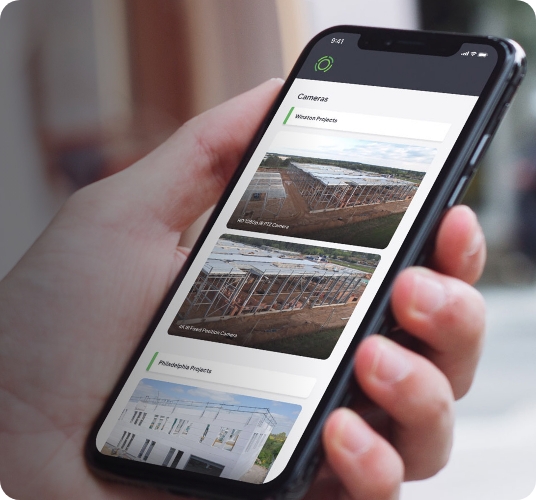
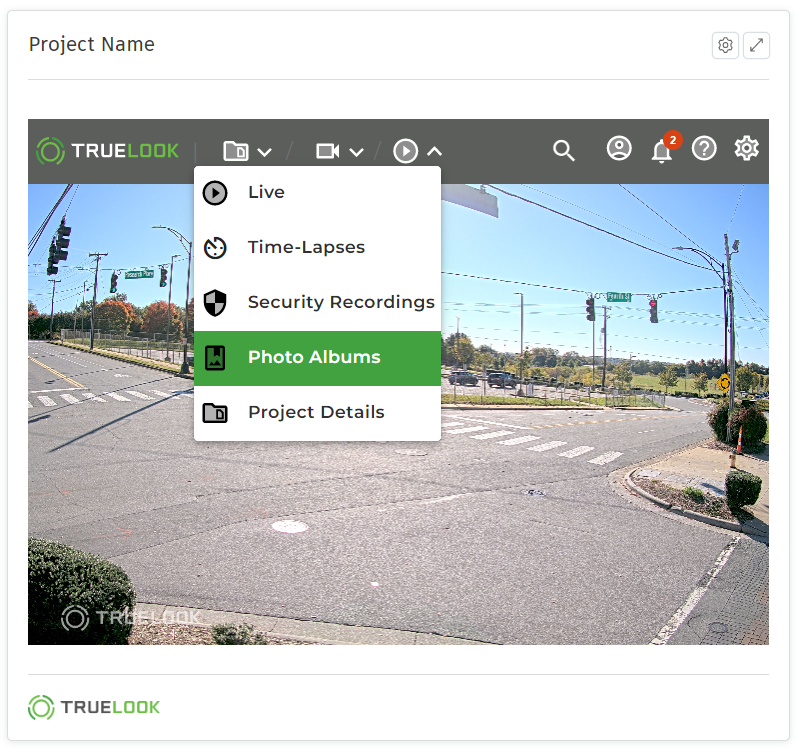
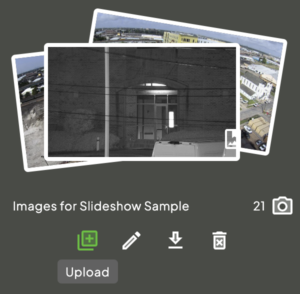
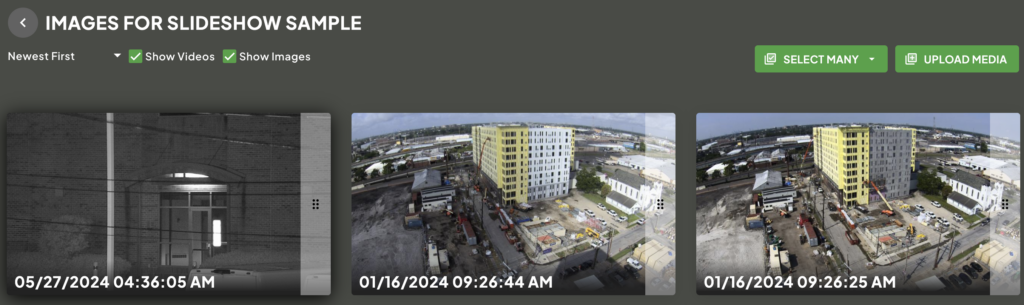
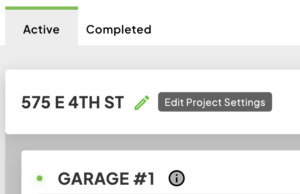
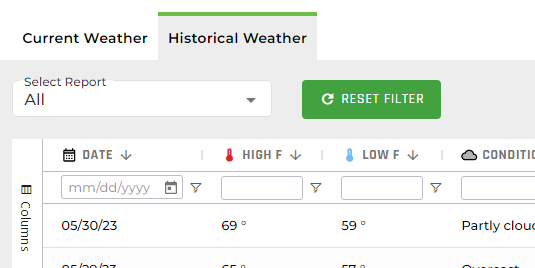
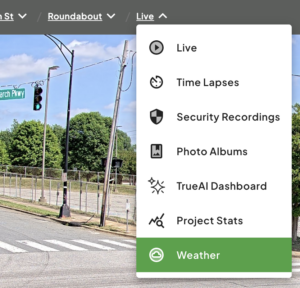
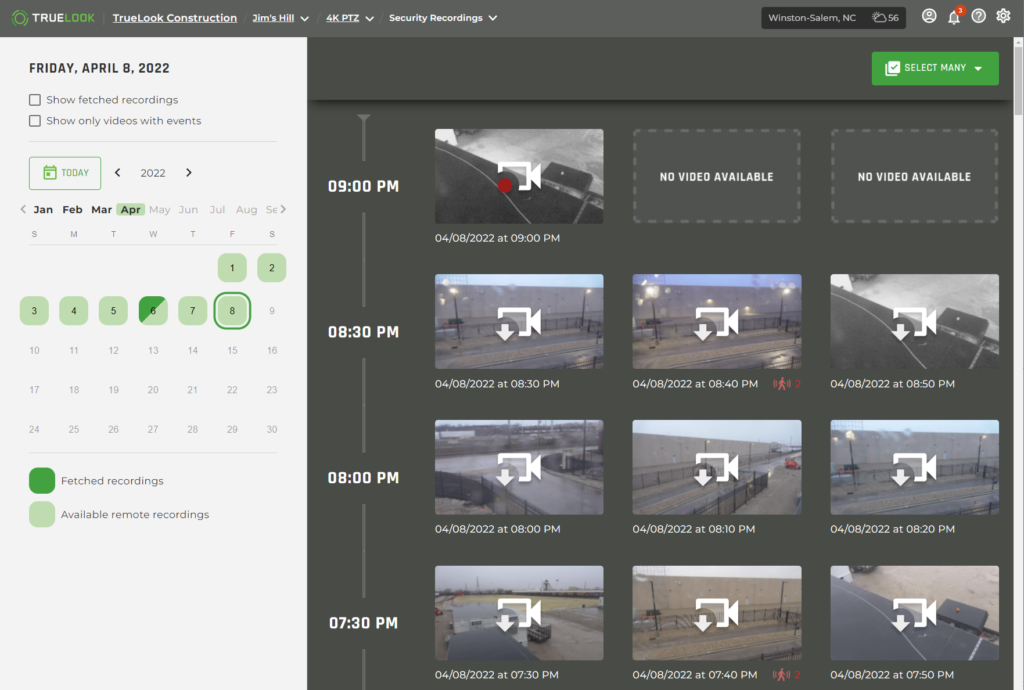
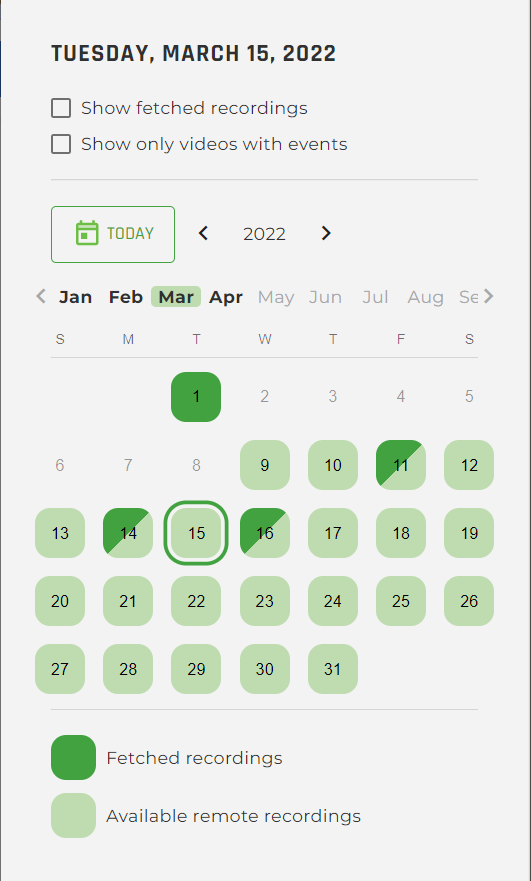
On your TrueLook dashboard, there are two tabs: “Cameras” and “Completed.” By default, you’ll be viewing the “Cameras” tab, but you can switch to the “Completed” tab to reference past projects. From here, you can access the same media files that you would in an active project. This includes time-lapses, time-lapse images, photo albums, and any fetched security recordings.

The following Support pages provide guides for these functions.

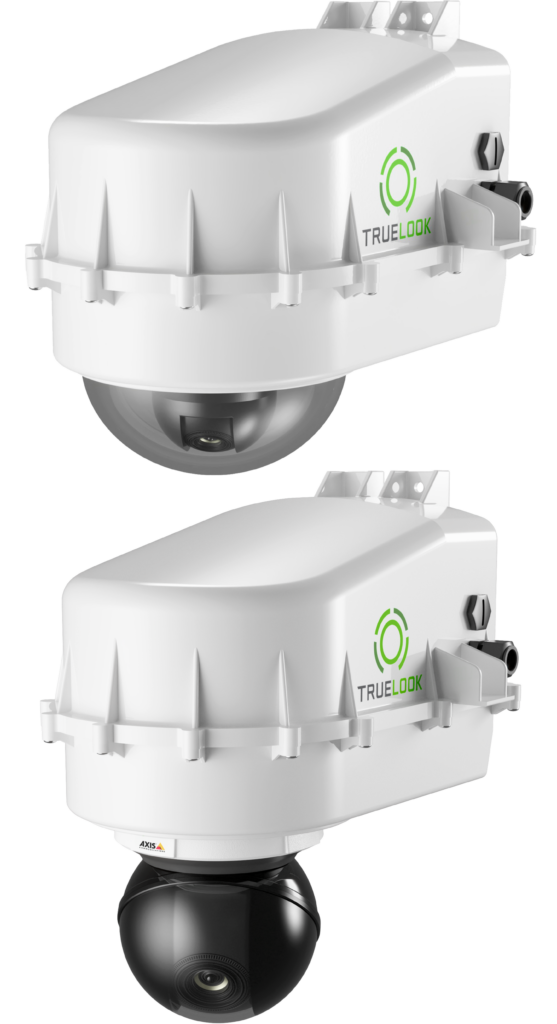
How do I return leased equipment?

For return instructions and frequently asked questions related to leasing, see our Leasing page.

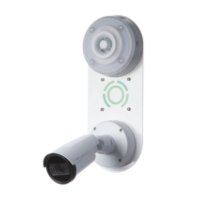
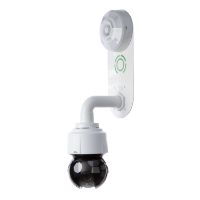
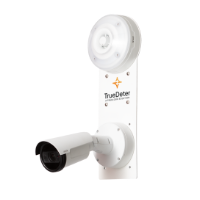
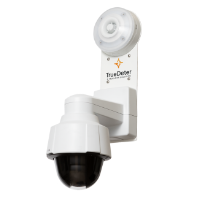
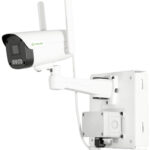
How should I store my equipment between projects?

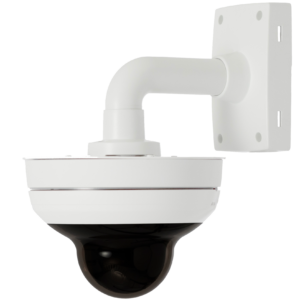
Our rugged hard cases are an ideal solution for storing and transporting cameras and other equipment. They are waterproof, crushproof, and designed specifically for the equipment.


Alternatively, cameras and solar panels can be bubble wrapped and stored in a box or other container.

Supported Browsers

TrueLook supports the latest versions for the following browsers.

  • Chrome
  • Firefox
  • Microsoft Edge
  • Safari

Logging In

Once your account has been created, you will receive an email asking you to reset your password. When you receive that email, click on the Login to TrueLook button and you will be prompted to create a new secure password. 

Password Rules

A password must contain:

  • At least 8 characters
  • One uppercase letter
  • One lowercase letter
  • And one number

After creating your new password you’ll be able to access the TrueLook platform (app.truelook.cloud) or by using the TrueLook mobile app (Google | Apple)


If you select Remember Me at login, your login information will be remembered by the system.

Note:The TrueLook platform uses your email address for your initial login. If you need help changing your email, or have forgotten it, please reach out to us at support@truelook.com.

SSO Setup

TrueLook SSO Menu - Authentication

SSO authentication option – Select your preferred SSO provider to integrate it into your account.

If No SSO Authentication is selected, all users must log in with an email and password. This is enabled by default.

Note – If multiple accounts are associated with a single email address:If the primary account is deactivated, the user will lose access to all accounts under that email. Be careful when deactivating accounts. 
TrueLook SSO Menu - Domain Names
TrueLook SSO Menu - Default User Authorization

Domain names – Create new SSO logins using the email domain(s) entered below (e.g., truelook.com; do not use @ before a domain name).

  • Can use up to five domains (click the sign).
  • The domain name must be unique, and the user must not exist in the system yet.
  • This applies to all projects on the account.

Enable auto-creation of users via SSO for the specified domain. 

  •  Allows configuration of the default user authorization settings for new accounts.

Enforce SSO Authentication – Requires the team to log in via SSO. If a user attempts to log in with an email and password, they will be redirected by a message to log in via SSO.


Click Save to save your SSO settings.

Setting up SSO for Microsoft Entra ID

The Microsoft Entra ID SSO requires a few extra steps to properly set up.

  • Follow the steps above: Log into TrueLook and navigate to the Access Control tab. Select Microsoft Entra ID from the list of SSOs and add your domain name(s).
  • Log out of TrueLook (Account menu → Log Out).
  • Log back in to TrueLook using the Log In Via SSO option with the domain name you added.
  • Accept the Microsoft Entra ID popup requesting permissions.
TrueLook Log In Screen
Microsoft Permissions Requested screen

Congratulations! You’ve successfully set up your Microsoft Entra ID SSO!


To confirm connectivity: Access your Microsoft Entra ID account. PROD-Truelook will be listed under your Microsoft Enterprise applications.

Microsoft Enterprise Applications screen

Accessing SSO

On the TrueLook platform login page, there are two ways to log in: Email and Password, or log in via SSO


To log in via SSO, enter your email address in the text box under log in via SSO. If it’s set up by your team’s administrator, you’ll be automatically logged in.


Access SSO by clicking on the top-right gear icon, selecting Customer Details, then Access Control from the tabs on the new page.

TrueLook Login Screen
Menu dropdown with "Customer Details" highlighted and "Access Control" tab opened.

Camera Shipping for Maintenance

Whether you’re sending your camera to TrueLook for repairs or moving cameras from one jobsite to another, it’s important to ensure camera safety during transit. Please follow the instructions below carefully and reach out if you have any questions.


(If you’re looking to ship leased equipment back, see the leasing resources page, which includes return guides.)


PLEASE NOTE: 

  • If you are sending a camera to TrueLook for repairs and the camera has a control box, you must send the control box with the camera.
  • If you are shipping your camera in a custom fitted hard case, bubble wrapping the components is not necessary.
 
 If you’re looking for instructions for returning a leased camera, go here
 

Interior Multi-Cameras

Interior Multi Camera
  1. Remove camera from mounting solution.
  2. Wrap camera in bubble wrap and secure with tape.
  3. Pack gently into chosen shipping box or hard case, adding packing material as needed to prevent shifting.
  4. If sending to TrueLook, attach provided shipping label securely to shipping box or hard case.

Legacy Fixed Cameras (without Control Box)

Fixed Camera
  1. Remove camera by unscrewing enclosure from mounting arm. Leave mounting arm in place to maintain positioning of camera.
  2. Wrap camera in bubble wrap and secure with tape.
  3. Pack gently into chosen shipping box or hard case, adding packing material as needed to prevent shifting.
  4. If sending to TrueLook, attach provided shipping label securely to shipping box or hard case.

Fixed Cameras (with Control Box)

Interior Fixed Camera
  1. Remove camera and control box from mounting solution.
  2. Put lens cap onto camera.
  3. Wrap camera and control box separately in bubble wrap and secure with tape.
  4. Pack camera and control box gently into chosen shipping box or hard case, adding packing material as needed to prevent shifting.
  5. If sending to TrueLook, attach provided shipping label securely to shipping box or hard case.

2K IR Fixed Cameras

  1. Remove camera from mounting solution.
  2. Push cellular antennas down to be parallel with camera body.
  3. Wrap camera in bubble wrap and secure with tape.
  4. Pack gently into chosen shipping box, adding packing material as needed to prevent shifting.
  5. If sending to TrueLook, attach provided shipping label securely to shipping box.

PTZ Cameras (without Control Box)

PTZ Camera
  1. Remove camera from mounting solution
  2. Wrap camera in bubble wrap and secure with tape.
  3. Pack gently into chosen shipping box or hard case, adding packing material as needed to prevent shifting.
  4. If sending to TrueLook, attach provided shipping label securely to shipping box or hard case.

PTZ Cameras (with Control Box)

2K IR PTZ Camera
  1. Remove camera and control box from mounting solution.
  2. Wrap camera and control box separately in bubble wrap and secure with tape.
  3. Pack gently into chosen shipping box or hard case, adding packing material as needed to prevent shifting.
  4. If sending to TrueLook, attach provided shipping label securely to shipping box or hard case.

TrueDeter PTZ

TrueDeter PTZ Camera

Note: Step 1 is needed only when packing the system into a custom fitted hard case.


  1. Remove camera from pendant housing using T30 Torx screwdriver and pack into circular hole in hard case.
  2. Remove camera system and control box from mounting solution.
  3. Wrap camera system and control box separately in bubble wrap and secure with tape.
  4. Pack gently into chosen shipping box or hard case, adding packing material as needed to prevent shifting.
  5. If sending to TrueLook, attach provided shipping label securely to shipping box or hard case.
  6.  

TrueDeter Fixed

TrueDeter Fixed Camera
  1. Remove camera system and control box from mounting solution.
  2. Put lens cap onto camera.
  3. Wrap camera system and control box separately in bubble wrap and secure with tape.
  4. Pack gently into chosen shipping box or hard case, adding packing material as needed to prevent shifting.
  5. If sending to TrueLook, attach provided shipping label securely to shipping box or hard case.

TrueShield

TrueShield Unit
  1. Remove camera(s) and bullhorn from enclosure by loosening wing nuts.
  2. Wrap camera(s) and bullhorn in bubble wrap and secure with tape.
  3. Wrap mounting studs on enclosure in bubble wrap and secure with tape.
  4. Pack gently into chosen shipping boxes or hard cases, adding packing material as needed to prevent shifting.
  5. If sending to TrueLook, attach provided shipping label securely to shipping box or hard case.

Frequently Asked Questions

If I’m shipping my camera to TrueLook for repairs, will TrueLook provide a box to ship the camera in? TrueLook does not provide boxes for shipping your camera to us, but suitable boxes are available at all major shipping carrier stores.


If I’m shipping my camera to TrueLook for repairs, can my box be arranged for pickup? Yes, you can schedule pickup with the shipping carrier. You will need to ensure that the label has been printed out and secured to the box prior to pickup.


I received a shipping label from TrueLook to ship my camera back for repairs. Do I need to print and attach the label to the box myself? Unless you are scheduling for package pickup with the shipping carrier, take the label to the appropriate shipping carrier store. It will be scanned, printed out, and applied to the box for you at the store.


What can I expect after I send my camera to TrueLook for repairs?  Once we receive your camera, our technicians will thoroughly assess it to see what actions need to be taken. We will reach out to let you know our findings and recommended next steps. 


After I pack the camera, what should I fill my shipping box with? We recommend filling the box with any standard packing materials (bubble wrap, packing paper, etc.) to avoid damage and shifting during transit.

Mobile Surveillance Trailers

Safety Alert!Prior to starting maintenance, please adhere to the following safety guidelines.
  • Remove all watches, jewelry, and other conductive materials.
  • Wear protective gear like safety goggles, a face shield, rubber gloves, a rubber apron, and footwear to prevent electrical shocks. 
  • Don’t allow smoking or open flames near the battery compartment.
  • Ensure proper ventilation when working on the batteries. 

Annual Battery Maintenance

Part 1: Voltage Test
  1. Check the voltage of each battery with a multimeter; a fully charged battery will be at 6.5V. Take note of which batteries are not fully charged, as they will need to be charged up to full in part 3.
  2. If batteries are deemed to be in need of replacement, contact TrueLook Support for replacement battery purchasing options.
Part 2: Powering Down Batteries
Safety Alert!To safely continue maintenance, you must power down all batteries to ensure they are not charging.

For trailers with three breaker switches in the battery compartment, power batteries down by turning off all three switches.


For trailers without three breaker switches in the battery compartment, remove the nuts coated in red on the positive and negative posts on each battery (see image to right) using a 1/2” socket or adjustable wrench. Move the battery connector wires so that they no longer touch the positive and negative posts.

Warning!Ensure the wrench does not touch the other post while removing nuts, or this will complete the electrical circuit and may cause a shock.
Part 3: Refilling Water
  1. Ensure the trailer is level by checking the built-in bubble level near the mast. If the trailer isn’t level, adjust the jack stands as needed by turning the handle clockwise to lower and counterclockwise to raise.
  2. Locate the three white vent caps on top of each battery and open them by rotating counterclockwise.
  3. Examine the plate at the bottom of the vent well (a flashlight may be needed to see it). Whether it is exposed or under water will determine your next steps.
Plate Is ExposedPlate Is Under Water
  1. Using a funnel, fill distilled or demineralized water ONLY just above the plate. Place the vent cap(s) back on.
  2. Charge batteries to full charge (if needed).
  3. Using a funnel, fill your battery with distilled or demineralized water ONLY. Fill it to ¼” below the vent well opening and no higher.
  4. Screw vent cap(s) back on.
  1. Charge batteries to full charge (if needed).
  2. Using a funnel, fill your battery with distilled or demineralized water ONLY. Fill it to ¼” below the vent well opening and no higher.
  3. Screw vent cap(s) back on.
Part 4: Battery Check and Powering Back On
  1. Check that all battery terminals are clean and corrosion free.
    • If battery terminals have corrosion, combine tap water and baking soda in a cup, dip a brush into the solution, and brush at the terminals. Rinse with clean water once the corrosion is gone. 
  2. Check that all battery cables are connected tightly.
  3. Turn batteries back on.
    • For trailers with three breaker switches in the battery compartment, turn on all three switches.
    • For trailers without three breaker switches in the battery compartment, move the battery connector wires so that they are on the positive and negative posts. Tighten the nuts back onto each post using a 1/2” socket or adjustable wrench. 
Warning!Ensure the wrench does not touch the other post while tightening nuts, or this will complete the electrical circuit and may cause a shock.

Trailer Mast Maintenance

Spray the winch cable and gears using a general lubricant spray like WD-40. Cycle the winch and mast up and down several times to ensure all parts are free of any bindings and have been coated properly with the lubricant.

Frequently Asked Questions

Why do I have to use distilled or demineralized water? Other kinds of water, like tap water, contain minerals that may damage your batteries. 


Why do I need to charge my batteries before refilling the water? If the water is filled to the proper level before charging, it will cause an overflow from added electrolytes and damage the battery. 


Why does the vent well plate need to be covered in a small amount of water before charging the battery? The plate being exposed during battery charging causes damage to the battery.


Why does the water need to be filled only to ¼” below the vent well opening? Too much water in the vent wells can cause charging issues and potentially damage the battery.

Solar Battery Replacement

Solar Packages & Skids

Replacement batteries can be purchased directly through TrueLook, but this is not required. You can also buy them online.

If you choose an alternate supplier, we recommend the following battery as a replacement: SLAA12-100C/FR Duracell Ultra 12V 100AH General Purpose AGM Sealed Lead Acid (SLA) Battery with M6 Insert Terminals.

If you are unable to find this exact battery, your chosen replacement battery should have similar specifications.

Mobile Surveillance Trailers

For assistance with mobile trailer batteries, please contact our Customer Support team.

Frequently Asked Questions

After replacing my solar backup battery, do I need to return it to TrueLook? Old batteries do not need to be returned to TrueLook. Please safely dispose of your old batteries in accordance with local laws.


Can I use lithium batteries? No, solar packages and solar skids are not rated for use with lithium batteries. Please only use batteries that meet the specifications outlined above.

Winter Weather

Safety Alert!If your area is actively experiencing dangerous weather conditions, wait until it is safe to begin troubleshooting.

While our equipment is designed to withstand harsh winters, downtime is possible if the weather is unusually severe or lasts for an extended period. In the event that you do experience issues with your camera and/or solar equipment, we’ve put together the following troubleshooting tips to help get your system back up and running as quickly as possible.


These tips are regularly updated for the latest TrueLook equipment. If the information below doesn’t look right for your equipment, contact us for recommendations customized to your setup.

Topic Troubleshooting
Extreme Cold Temperatures Most of our cameras are built to withstand temperatures as low as -40° F. Weather conditions dipping below this can cause a camera to go offline temporarily, but it should resume normal operation once the temperature goes back up. It’s also important to note that batteries may experience less efficiency in colder conditions.
Limited Sunlight 

Extended cloud cover can cause a low voltage disconnect. If this occurs, the system will need full sunshine to recharge and come back online. Depending on how low the charge is, this may take a day or so after the sunlight returns.

Your camera may also go on and offline during this time as it waits to regain sufficient charge levels. You can prevent this by temporarily disconnecting the load to the camera, allowing the battery to charge, and waiting until the voltage has increased before reconnecting it.


We recommend checking that all readouts are within the normal range prior to contacting TrueLook support.

Adjusting Solar Panel Angles

Double-check that your solar panels are facing due south and set to the correct angle for your location. The sun is at a lower angle in the winter months, so non-ideal placement can further decrease efficiency during this time of year. The installation manual for your solar power system has information that on ideal angles for your location. You can also access solar panel data for all U.S. cities, including optimal seasonal angles, through Solarific.


You’ll also want to double-check that nothing is blocking the sun from your solar panels. Trees, buildings, and other objects that aren’t an issue most of the year could be blocking the sun at its lower winter angle.

Removing Snow from Solar Panels

Solar panels typically heat up enough on their own to melt snow and ice quickly. The panels are also designed to withstand the weight of snow and ice that can accumulate.


If you are experiencing extended snowstorms and wish to be proactive, a soft brush can help remove the snow faster. Make sure to do this gently, as a rough brush or too much pressure can damage your solar panels. Also, never use harsh chemicals or abrasive materials on the solar panels.


If your solar panels are closer to ground level (such as on a solar skid or mobile trailer), removing the nearby snow from the ground can help prevent the wind from blowing snow back onto your panels.

Backup Batteries & Voltage It’s a good idea to routinely check the voltage of your solar power backup batteries so you can spot potential problems before they occur. Battery voltage can be measured at the battery terminals directly with a multimeter or can be viewed from the charge control readings.
Cable Troubleshooting

First, ensure that the cables are connected and do not have any visible damage.


The cables connecting the solar panels to the battery have weather-tight connectors which can be removed for further troubleshooting. If the cable has been in use for a while or was pulled back too hard, the inner copper leads may not be making contact with the opposite lead. Contact support for guidance on how to proceed.

Alternate Power Sources or Batteries

If your area experiences extended cloud coverage and voltage routinely drops below 11.5 Volts DC, you may want to temporarily switch to  110V power for your camera.


If your equipment does not have this built in, there is a 110V adapter that can be added to legacy solar models. Our support team can help you assess if this option is right for your jobsite.

All Other Winter Weather Troubleshooting Please ensure that all equipment and cabling has been fully inspected before submitting a support request. If all readouts are correct, a few pictures will help TrueLook support diagnose the issue faster. Please share pictures of your equipment setup as well as the inside of any control boxes, especially showing any components that have lights on (or look like they should have lights on).

Severe Weather

While our equipment is designed to withstand harsh environments, downtime is possible if the weather is severe enough. In the event that you do experience issues with your camera, we’ve put together the following troubleshooting tips to help get your system back up and running as quickly as possible.

Safety Alert!If your area is experiencing high winds, tornados, flooding, lightning, or any other dangerous weather conditions, wait until it is safe to begin troubleshooting.
TopicTroubleshooting
110V-Powered SystemsVerify that your jobsite currently has power and physically verify that the equipment has not been damaged in any way. If you don’t see any damage, we recommend taking a picture of the cellular modem lights inside the camera or control box housing. This picture will help our support team further troubleshoot the issue.
Solar-Powered SystemsFollowing severe weather, cloud cover can cause a low voltage disconnect. If this occurs, the system will need full sunshine to recharge and come back online. Depending on how low the charge is, this may take a day or so after the storm has passed. We recommend checking that all readouts are within the normal range prior to contacting TrueLook support.
Connection FailuresCheck the outage maps for your area to see if your local infrastructure is having issues due to damage or downed trees. If you experience slow network speeds, your network data priority could be shifted to the First Responder Network until the end of the severe weather event.
Damaged EquipmentIf your equipment is damaged, please submit a support case with all relevant pictures and documentation. Damage due to storms is not typically covered under TrueLook’s manufacturer warranty and would need to be reviewed.
All Other Severe Weather TroubleshootingPlease ensure that all equipment and cabling has been fully inspected before submitting a support request. If all readouts are correct, a picture of the cellular modem lights in the camera or control box housing can help TrueLook support diagnose the issue.

General Troubleshooting

See the following table for possible issues and potential solutions.

IssueTroubleshooting
Connection Failures

As with any data service, brief connectivity issues may occur from time to time. Retry the connection or refresh the page, and most issues will resolve themselves.

If the problem persists and you do not own the camera, report the issue to TrueLook Customer Support.

If the problem persists and you do own the camera, ensure that the camera still has power. A breaker may have tripped or the camera may have been accidentally unplugged. For solar-power cameras, check the battery status. If you still cannot determine the cause of the problem, contact TrueLook Customer Support for assistance.

Grainy or Fuzzy ImagesThe maximum zoom level for some cameras is produced digitally (by magnification of the pixels) rather than optically (by physical lens capabilities). Extreme digital zoom levels can result in poorly resolved images. Alternatively, the camera lens or weather casing may need to be cleaned. Email support@truelook.com so we can notify the camera owner.
Poor LightingExterior cameras are subject to harsh lighting at certain times of day, which may be the cause of poorly lit images. However, if you notice a lighting problem, such as darkness at mid-day or constant over-exposure, email support@truelook.com so we can adjust the settings.

Troubleshooting Preparation

Point of Contact

It’s important to have a dedicated point of contact for your jobsite. Select someone who is onsite and has direct access to the camera and its components. 


Make sure to:

Preparation & Tools

See below how to prepare based on your camera’s power type. Have the listed tools ready, but do not attempt troubleshooting without the guidance of Customer Support. 

Solar
TrueLook Controller Box

To Do:

  • Email a picture of the charge controller screen (see illustration on right) to TrueLook Customer Support. You can use the left and right arrows to navigate to this screen. 
  • If the screen is not on, check the battery breaker is in the on position and check for battery voltage. A battery with a low charge will not power the charge controller.
Tool(s) NeededTask
MultimeterChecking power at connections

Phillips head screwdriver

Allen wrenches of various sizes

Opening camera and/or control box enclosure
Size 1 Phillips head screwdriverTroubleshooting modem lights and SIM card
Small flathead screwdriverWiring terminals located in battery box
Channel locks or pliersReseating weather-tight cables
110V

To Do:

  • If you have a control box, email pictures of the inside of the control box to TrueLook Customer Support.
  • If you have an external power converter, email pictures of the inside of the external power converter to TrueLook Customer Support.


Tool(s) NeededTask
MultimeterVerifying power

Phillips head screwdriver

Allen wrenches of various sizes

Opening camera and/or control box enclosure
Size 1 Phillips head screwdriverTroubleshooting modem lights and SIM card
PoE

To Do:

  • Email a picture of the PoE lights or the lights on your local powered switch port that the camera is plugged into to TrueLook Customer Support.
  • If applicable, email a picture of the camera’s external power indicator light to TrueLook Customer Support. 
  • Verify that ports 80 and 3128 are open on your local network for the port that the camera is plugged into.

Creating Email Updates

Add Email Updates window

You can create email updates for as many email addresses as you wish.


Select any of your active cameras, then customize the frequency and time you would like to send your automated email updates. The emails can be unsubscribed from at any time.


This feature is identical to the email updates found in an individual’s user account, except that admins can create alerts for any email address. The individual user can only manage their own subscription.


Use this feature to have TrueLook automatically send you photos from your camera. This lets you see your project progress right inside your inbox.


You may select one of your active time-lapses and then choose when you would like to receive email updates. TrueLook will use your settings to automatically email you the latest time-lapse image.

Introduction

Account Menu - Email Updates

TrueLook can send you automated email updates with images from your camera. This is an easy way to keep track of your project’s progress.


To access Email Updates, click on the Account icon in the top right corner of the Dashboard, then select Email Updates.

Roles and Permissions

There are three primary user roles to select from when adding new users.


Each role has a different level of permissions, listed below:

Customer AdminTotal access to all features, cameras and projects. Customer Admin inherits permissions for any newly added projects.
Project AdminProject Admins have similar permissions to a Customer Admin, but only on the Project(s) they are assigned to. This is further detailed below.
UserLimited access (defined by permissions) to specific projects. There are some admin level features they will never have access to and can’t be granted to the Custom User role.

If an admin wants to share a camera without creating a new user, they can create a Sharing Link that allows a user to view the camera without login credentials.

Project Admin Permissions

Project Admins have mostly similar functions to Customer Admins, but locked to the projects they administrate.

For example: Project Admins can Edit, Copy Link, Embed Code, Duplicate, and Delete any Sharing Link only on projects they’re administrators on.


There are a few differences, listed below:

  • Project Admins cannot access any Customer Details.
  • Project Admins have specific User Management rules.
    • Can only add Project Admin and Customer Access users.
    • Can only deactivate users who are not assigned to any other project except the ones they administrate.

Introduction

The TrueLook platform allows the Customer Admins to manage their users accounts without the need for TrueLook Support to be involved.


This can be accessed by selecting User Management under Settings (the gear icon), located in the top right of the navigation bar.

Settings - User Management Dropdown

By navigating to the User Management page, Admins are able to perform the following:

  • Add users
  • Edit user accounts
  • Delete users
  • Reset passwords for user accounts
User Management Window

Resume Monitoring Schedule

Jobsite Monitoring Pause Icon
Jobsite Monitoring Resume Icon Zoomed

If you wish to resume the regular monitoring before your scheduled pause ends, click on the Resume button and your monitoring schedule will start again immediately.

Pausing Jobsite Monitoring

The Pause feature allows you to prevent Jobsite Monitoring from sending alerts during a scheduled monitoring period. For example: you normally have monitoring all day on Saturday and Sunday, but for the next Saturday morning you would like to pause the monitoring so you and your team can finish up some work from the previous week.

From the Dashboard, find the project you have Jobsite Monitoring enabled on. From here, click the Pause icon. This will open the Pause Surveillance window to configure when you want Jobsite Monitoring to resume.

Jobsite Monitoring Pause Icon
Jobsite Monitoring Pause Icon Zoomed

From the Dashboard, find the project you have Jobsite Monitoring enabled on. From here, click the Pause icon. This will open the Pause Surveillance window to configure when you want Jobsite Monitoring to resume.


Select a date and a time to resume the monitoring schedule. You can only select up to six days in the future.


Once you have selected a date and time, click the Set button and your pause will be in place immediately.


When the end date and time you set for the pause passes, the monitoring will return to its regular schedule.

Jobsite Monitoring Surveillance Drawer
Jobsite Monitoring Pause Calendar
Jobsite Monitoring Pause Time

Configuring Jobsite Monitoring

TrueLook must enable Jobsite Monitoring on your project first. If you need assistance with Jobsite Monitoring, please contact TrueLook Support.

From the Dashboard, find the project you have Jobsite Monitoring enabled on. From here, click the Configure icon. This will open the configuration to set up the project’s Jobsite Monitoring options.

Jobsite Monitoring Configure Icon
Jobsite Monitoring Configure Icon Zoomed

Alert Summary

Jobsite Monitoring Main Window

Alert Summary shows the summary of information set up for your Jobsite Monitoring alerts.


If there are any elements that still need to be configured, the “DRAFT – Alerts will not be sent!” message will appear. These will need to be addressed before Jobsite Monitoring Alerts are active and anything is sent to the monitoring center.

Jobsite Monitoring No Alerts Set

If you have not set up a Jobsite Monitoring Alert, you’ll see a screen with a single button to begin setting it up.

Jobsite Monitoring Edit Menu

To edit an alert that’s already created, open the three-dot menu near the map and select Edit to configure your alert.

Notify Users

Notify Users determines what user-notification actions happen when a security event occurs. 

 Event Alert Notifications determine what actions happen when a security event occurs. 

  • Notify Customer Call Tree Members: If on, our system will automatically contact people in the directory once a valid alert occurs (an alert that meets the severity level set in the Set Schedule step).
  • Notify Monitoring Center: If on, our monitoring center will contact people in the directory if an alert passes the JSM Severity threshold.
  • Alert for Non-Threat Events: If on, our system will send alerts for all motion events, regardless of the severity set in the Set Schedule step.
Jobsite Monitoring Notify Users Screen Event Alert

The 4-digit PIN is a number to confirm your identity for alert text and phone calls.


Enter a 4-digit PIN at the bottom of the page. Once a user accepts the assignment in the next step, they will receive a text message with the PIN code to reference when contacted.

The person contacted must provide the correct PIN to cancel an alert.
Jobsite Monitoring Notify Users Screen Event PIN

Select Users

Authorized users on the Select Users list will be contacted if activity is detected on your jobsite by checking the box in front of their name. 


To be selectable as a contact, a user must have:

  • Access to Security Recordings in the system.
    • Note: Customer Administrators and Project Administrators have the correct security setting by default. Custom roles can be created to have access to Security Recordings.
  • A valid US Cell Phone number.
  • The ability to receive SMS messages on their cell phone.

If selected as a contact, the user will receive a text message. Each text message expires in 1 hour, so ensure the user is ready and available to respond to the message. If you do not see a user you expected to see, review their account in User Management.


When multiple applicable users are listed, the monitoring center will contact the first user on the list. If there is no answer, they will move on to the next user, and so on. You are limited to a maximum of 5 users for this section.


To order people on the list, drag the users into the order you would like.

Jobsite Monitoring Select Users Screen

Select Cameras

Jobsite Monitoring Select Cameras Screen

On the Select Cameras step, you can select one or more cameras to activate Jobsite Monitoring on. You can also set up options for what happens when the camera goes offline, download Security Recordings, and if Guard Tour is activated (PTZ cameras only).


 To select a camera: Click the checkbox on the camera’s preview image. If you’re unsure of the placement or orientation of your camera for Jobsite Monitoring, contact TrueLook Support.

Jobsite Monitoring Camera Down Notification Window
Jobsite Monitoring Camera Offline Alerts

You can select when you receive text messages after a selected Jobsite Monitoring Camera goes offline. You can select one of the following choices:

  • Do not notify me
  • 5 minutes
  • 15 minutes
  • 30 minutes
  • 1 hour

If Automatically download movies on Security Recordings is selected, 10 minutes of footage before the alert is downloaded and saved automatically to your account. Regardless of what’s chosen, a 15-second clip is sent to the monitoring center when a motion alert occurs.


With JSM Guard Tour, we set up preset positions for a PTZ camera to move between, allowing it to monitor more of the jobsite. This follows the hours set on the Jobsite Monitoring scheduler.

Guard Tour optionis only available for PTZ cameras.

For example: The camera will stay at the main preset location for 2 minutes, then it will move to its first set location for 20 seconds, then its second set location for 20 seconds, before returning to its main preset location for 2 minutes and repeating.

Any time-lapses running during Guard Tour hours will be stopped during that time. It’ll automatically start again once the Guard Tour hours are over.

Verify Address

The next step in the wizard is to verify the correct address for the jobsite. Specifically, this should be the precise address you want the police to respond to in the event of an alert.

  • Enter address of jobsite for Emergency Services – Enter your jobsite’s address into the fields. This is where any Emergency Services will go to, if called, so ensure that it is accurate.

  • Instructions for Dispatchers (Required) –  This is used to give the dispatchers any additional information to share with the police. Examples are gate/alarm codes or instructions specific to reach the jobsite.
  • Reposition Pin – This allows you to click a point on the map to select an address. The map will drop a pin where you clicked and provide an address. This will be used instead of the address provided.
Jobsite Monitoring Verify Address Screen

Set Schedule

The next step in the wizard is to define the hours you want alerts to be sent. Our cameras perceive motion as an alert, so for an alarm you only want to have this enabled for when motion is not expected on your jobsite. Setting the hours to well outside working hours is recommended.

Jobsite Monitoring Set Schedule Screen
  • JSM severity – Select the sensitivity of an alert situation to send notifications on. Events are reviewed by a manned monitoring center representative, so this is subjective.
    • Crime-Only – Is there an ongoing, probable crime?
    • Suspicious Activity – Is the motion alert not caused by not police, security, or a construction worker?
    • All Activity – Is anybody on-site during off-hours?

Select Schedule Type changes how schedule calendar is set: Whether the time you set on represents times JSM is monitoring (armed) or times JSM is not monitoring (disarmed).


Once finished entering your alert schedule, click Save Alert.

Introduction

Jobsite Monitoring combines our Intelligent Security with human verification to provide you with complete, trusted jobsite protection.


With Jobsite Monitoring, motion alerts captured by your cameras will be verified by a trained professional before you are alerted. No more alerts in the middle of the night because a raccoon has climbed your fence.


In the event of a verified alert, our trained professionals will contact you within minutes, giving you the option to request emergency services or dismiss the alert. If you do not respond to the agent, emergency services will automatically be sent to your site.


Currently, Jobsite Monitoring is only available on our Fixed 4K IR, 2K IR PTZ, and 1080p IR PTZ cameras with Advanced or Premium subscription tiers.

Single Sign-On

For information on how to log in to the TrueLook Platform using your Autodesk or Procore credentials, see Single Sign-On.

DroneDeploy

Prefer a video? Check out tutorial below on setting up the DroneDeploy integration.

Add Your Camera to DroneDeploy

DroneDeploy Sharing Link window
The sharing link required for the DroneDeploy integration can only be created by an account admin. Alternatively: any user can use previously created sharing links.
  • Log in to the TrueLook Platform.
  • Click the Settings icon in the upper right-hand corner and navigate to Sharing Center.
  • Click the Sharing Link button.
  • Name your new sharing link then select your cameras and options.
  • Click save.
Sharing Link Window
  • Find your sharing link name in the Links table.
  • Click the dotted menu icon on the same row to the right.
  • Select Copy Link from the dropdown.
DroneDeploy camera select
  • Log in to DroneDeploy.
  • Click into the project you want your camera visible on.
  • Click on the Cameras tab.
  • Paste the link you copied from TrueLook into the center text box.
  • Click Connect. Now your camera is integrated.

Change the Camera on a DroneDeploy Project

DroneDeploy Camera URL Window closed
DroneDeploy Camera URL Window opened

You can change the camera by clicking the small, upper-left tab. This reveals a side panel to change the current camera link to another.

Autodesk

Requirements

  • Username & password for an Autodesk account with admin access to the Autodesk project.
  • TrueLook account with integrations and customer admin access.

Authorize TrueLook

Customer Details Menu
Customer Detail Tabs
Autodesk Integration Connect Box
Authorization only needs to be done once.
  • Log in to the TrueLook platform as a user that has permission for integration settings.
  • Click the Settings gear in the top-right corner of the dashboard and select Customer Details.
  • Navigate to the Integrations tab.
  • Click Connect on the Autodesk widget.
Autodesk Authorization Window
  • This will open up a page to log in to Autodesk.
  • Log in. with your username and password.
  • Click Allow on the next Authorize Application screen.
Autodesk Successful Connection
  • You will see a message confirming the connection has been successful.

Access TrueLook Cameras within Autodesk

Autodesk Customize Button
Autodesk Card Library button
  • From your Autodesk dashboard, click Customize in the top-right corner of the dashboard.
  • The Card Library button will appear. Select it to open the library.
Autodesk Add Card Window
Autodesk Configure Card
  • Search for “TrueLook” in the card library using the search bar.
  • Select the TrueLook card and click Add Card at the bottom. The TrueLook card will now appear on your dashboard. 
  • On the new TrueLook card, click Configure to add your camera. You may be prompted to sign in to TrueLook prior to adding the camera.
Autodesk Configure Title + URL
Autodesk Camera Expand Option
  • From here, you can title the card and copy-paste the URL for the TrueLook project you would like to view on your dashboard. Then, click Save.
To get the Partner URL,access the camera you want to view in Autodesk on TrueLook. Once there, copy the URL from your browser. This will be what you paste into Autodesk's Partner URL box.
  • You can now view your TrueLook camera on the card with the same options, functions, and project navigation as if you were on TrueLook. 
Depending on your screen size, you may need to expand the card to fully access all PTZ camera options by clicking "Expand" on the card.

Markup Image within Autodesk

Autodesk Camera Photo Album Navigation
For the best view, we recommend doing markups with your Autodesk/TrueLook card expanded.
  • On the TrueLook Camera in your card, navigate to Photo Albums from the breadcrumb menu.
Autodesk Camera Markup Image
  • Select the image you want to mark up. This can be done to any image from live view or time-lapse captured images.
  • Select Markup Image in the top right corner of the image.
For the best view, we recommend doing markups with your Autodesk/TrueLook card expanded.
Autodesk Save to Photo Album
Autodesk Marked Up Image
  • Mark up the image with text, shapes, arrows, etc.
  • When finished, click on the three dots at the top right and select Save to Photo Album.
  • Add a description (optional) and choose which photo album(s) you’d like to add the image to.
  • Finish by clicking Add to Album, and you’ll see a notification that the image will be added.

Add New/Additional Projects

Autodesk Connected Integration Card
Autodesk Manage Integration

You can link new or additional projects in the Autodesk integration window.  You have the ability to send images from an already-created time-lapse or photo album.


Linking photo albums and time-lapses is optional.


  • On the TrueLook platform, from Setting → Customer Details → Integrations tab, click Edit on the Autodesk widget.
  • In the Manage Autodesk Integration window, link Autodesk project(s) to TrueLook project(s).
If no time-lapses or photo albums are selected, no images will be automatically sent to Autodesk.

Linking Time-Lapses & Photo Albums

Time Lapse Integration Options
Autodesk Successful Connection

If you want to link time-lapses or photo albums to Autodesk:

  • On the TrueLook platform, navigate to the Integrations tab and click Edit on the Autodesk widget.
  • Select the Autodesk project to link to.
  • Pick media from the Time-Lapse and Photo Albums dropdown menu.
  • Once everything is selected, click Save. A confirmation message will display validating a successful integration with Autodesk.

Procore

Are you a visual learner? Check out our video on how to set up the Procore integration:

Requirements

  • Username & password for a Procore account with admin access to the Procore project.
  • TrueLook account with integrations and customer admin access level.

Authorize TrueLook to Use Your Account

Authorizing only has to be done once. If you’re having issues with your Procore integration staying connected after this authorization process, the following:
  • Manually updating your Procore TrueLook application. (see Manual Update below.)
  • Adding your project from the Procore Permissions tab. (See Add New/Additional Projects below)
  • If these don’t work, contact us!

To authorize TrueLook to use your Procore account.

  • Log in to Procore as a user that has permissions for integration settings.
  • Click Apps in the top-right corner, then select Marketplace.
Procore Marketplace Button
  • Enter “TrueLook” into the search bar and select it from the list.
Procore App Search
  • On the following TrueLook app page, click Install.
  • Select your projects to link to Procore and accept all permissions Procore requests.
Procore App Install Page
  • Once installed, log in to the TrueLook app.
  • Access the Integrations tab:
    • Click the Settings icon in the upper-right corner, select Customer Details, then the Integrations tab.
  • Click Connect on the Procore widget.
  • Click Allow on the Authorization required popup.
You may be prompted to log into Procore. Provide the same credentials used to install the TrueLook App on the Procore Marketplace.
Integration Tab
Procore Authorization Screen
  • You will see a message confirming the connection has been successful.

You can now access and log in to TrueLook on Procore.

Procore Successful Connection
Note:If you want to allow other users to install applications, click the "Allow User Install" toggle. If you do not see the "Allow User Installs" toggle, please contact your admin to enable Procore themselves or by adjusting the permissions for your account.
Procore Allow User Install

Manual Update

Procore Apps Dropdown Menu
Procore Update Confirmation Window

Procore may require you to update the TrueLook application on their website.

  • Log in to Procore as a user that has permissions for integration settings.
  • Click Apps in the top-right corner, then select Marketplace.
  • Find the TrueLook application and see if it has the Update Available tag. Note: If it does not have this tag, you do not need to update.
  • If the Update Available tag is found: Click View, then click Update Available
  • Click Update on the pop-up window once, then click Update a second time to confirm.

Add New/Additional Projects

You can link new or additional projects in Procore.  This will allow you to send images from an already created time-lapse or photo album. Linking Photo Albums and Time-lapses are optional.

  • Log in to Procore as a user that has permissions for project settings.
  • Click Apps in the top-right corner, then select App Management.
  • Select TrueLook, then click on the Permissions tab.
  • Under Permitted Projects, you can select from your TrueLook projects. Click “Add” once they’re selected.
  • Your projects are now accessible on Procore.
Procore Apps Dropdown Menu
Procore Permission Project search window

Linking Photo Albums and Time-Lapses

Customer Details Menu
Integrations Tab
Procore Integration Options Box
Manage Procore Integration window
Successful integration popup

To link a photo album, you’ll need to connect them from TrueLook.

  • Log in to TrueLook as a user that has permissions for integration settings.
  • Click Settings in the top-right corner of the dashboard → Customer Details → Integrations tab.
  • Click Edit on the Procore widget.
  • Select the project to pull photo albums or time-lapses from.
  • Select the photo albums or time-lapses to include.
  • Click Save. A confirmation message displays validating a successful integration with Procore.
If time-lapses or photo albums are NOT selected, no images will be automatically sent to Procore.

Share Images from TrueLook to Procore or Autodesk

Share Button
Share Window
The following images follow the “Share to Procore” section, but the process will be the same for either integration. For Autodesk sharing, the only visual difference will be the title of the sharing menu, which will read “Share to Autodesk.”

On TrueLook, navigate to the image you want to share with Procore or Autodesk. Then click the Share icon.


In the Share window, choose either the Procore or Autodesk via their icons. This opens a new window.


In the Share to Procore/Autodesk window, select the project you want to share from the Select Procore/Autodesk Project drop-down.


Type any additional information into the Comments field (optional).


Click Share and the image will be shared onto Procore or Autodesk.

Markup Image and Create RFI

You can easily mark up images and assign them in Procore.

  • From the Dashboard, click on the camera image you want to create an RFI from. This can be done to any image from Live View or Time-Lapse captured images.
  • Click the Share button.
  • Click Markup Image button.
If using time-lapse mode:Select your desired image from the calendar and time.
Share Button
Share Window
Marking up your image is optional!

You can easily mark up images and assign them in Procore.

  • Using Markup Image tools, mark up your image as needed.
  • When you’re done with your markups, click vertical ellipses in the upper-right corner.
  • Click Create Procore RFI. This opens the Create Procore RFI window.
Create Procore RFI
  • Enter/select the following information.
    • Subject: The RFI’s subject name.
    • Question: Question(s) you want to ask anyone viewing the RFI.
    • Select Procore Project: Select the specific Procore project to attach this image to.
    • Select RFI Manager: Select the manager to assign for this RFI.
    • Select Assignees: Person(s) that you want to review the image.
Create Procore RFI window
  • Click Create. The RFI will be created in your Procore project.
  • A message will confirm your RFI is now in Procore.
To view your RFI, you must be logged in to Procore.

Use a TrueLook Camera on Procore

Procore Apps Dropdown Menu
Procore TrueLook App Listing
Procore Configuration Tab
First,follow the steps above to Authorize TrueLook to Use Your Account.
  • Log in to Procore. Open the Apps menu and select App Management.
  • Select View in the row with TrueLook.
  • Click the Configurations tab, then click Create Configuration.
Procore Configuration Menu
Procore Apps Dropdown Menu
  • Select the project you want to use a camera from, any options, and title the configuration.
  • Click Create.
  • Open the Apps menu again. Your configuration will be listed.
  • Select the newly listed configuration. It’ll provide the live camera feed to your TrueLook Camera with all the functions you’d have on the TrueLook platform itself.
It may take a couple of minutes for the new configuration to show up.

Introduction

Access your jobsite images, videos, and other documentation in one location by integrating TrueLook with other platforms. We integrate with multiple project management and reality capture tools. Integration with TrueLook is easy!


To get started, access the Settings gear in the top-right corner of the dashboard, then select Customer Details. On the following screen, navigate to the Integrations tab.


Below are the partners that TrueLook integrates with.

Customer Details Menu
Integration Tab

TrueLook's Integration Partners

Procore Icon

Procore

You can store TrueLook photos automatically into Procore, manually send camera photos to Procore albums, and access your Procore contacts to email or invite them to TrueLook.

Note: You must have a Procore account to access the Procore integration within the TrueLook Application.

Autodesk Icon

Autodesk

You can store TrueLook photos automatically into Autodesk Construction Cloud, manually send camera photos to Autodesk albums, and access your Autodesk contacts to email or invite them to TrueLook.

Note: You must have an Autodesk BIM360 account to access the Autodesk integration within the TrueLook Application.

DroneDeploy Icon

DroneDeploy

You can implement your TrueLook Camera into your DroneDeploy projects. This includes the camera controls available to you on TrueLook.

Raken Icon

Raken

Your can add your TrueLook Camera to your Raken project. TrueLook Camera controls will available on Raken as well.

Note: Must have an active Raken Professional, Performance, or Enterprise subscription.

Photo and Video Menu Options

Rename Image/Video

Photo Drawer Rename Icon
Photo Has Been Renamed window

To rename an image/video and add a description:

  1. After displaying the image/video photo album menu, click the Rename icon from the menu.
  2. The Rename window will open.
  3. Enter a new name for the image/video.
  4. If desired, enter a Description for the image/video.
  5. Click Rename File. If you do not want to save any changes, click Cancel.
  6. You will receive a message confirming the change.
  7. The image/video will now appear renamed on the Photo Albums page.

Markup Image

Photo Drawer Markup Icon

Refer to our Markup Image section under Sharing Videos & Images for more information about how to mark up images.


Please note that the markup option is only available for images.

Download Image

Photo Drawer Download Icon
Download Image Window
Download Started Message

Photo album images can be downloaded by performing the following steps:

  1. After displaying the image photo album menu, click the Download icon.
  2. The Download window will pop up.
  3. You can add the project name, address and/or timestamp.
  4. Click Download to download the image. If you do not want to download the image, click Cancel.
  5. Once the image has started downloading, you will receive a confirmation message.
  6. Check your Download folder (or download area of your browser) to find your image.

Download Videos

Download Started Message

Photo album videos can be downloaded by performing the following steps:

  1. After displaying the video photo album menu, click the Download icon.
  2. Once the video has started downloading, you will receive a confirmation message.
  3. Check your Download folder (or download area of your browser) to find your video.

Share Images & Videos

Photo Drawer Share Icon

You can share a photo album image or video from the photo album window.


Refer to Sharing Videos & Images for more information on how to share a photo or video.

Delete Photos & Videos

Photo Drawer Delete Icon
Photo Drawer Deletion Confirmation

Photo album videos can be deleted by performing the following steps:

  1. After displaying the video photo album menu, click the Delete icon.
  2. When you receive a confirmation to delete the file, click Delete. If you do not want to delete the image, click Cancel.
  3. Once Delete is selected, you will receive a confirmation message.

Manage Images and videos

You can rename, download, share, or delete a selected image/video from within a Photo Album. There is also an additional option for photos, allowing you to add markups.


To display the image/video photo album menu, hover over the desired image/video thumbnail and click the vertical ellipses on the right side of the image/video.


Once you click the vertical ellipses, the full image/video photo album menu is displayed.

Manage Photo Tools Icon
Manage Photo Tools Drawer Open
Photo Rename Icon

Rename Photo/Video

Click to rename the photo or video.

Photo Markup Icon

Markup Photo

Click to markup the photo. Note: Markup is only available on images.

Photo Download Icon

Download photo/video

Click to download photo/video.

Photo Share Icon

Share photo/video

Click to share photo/video.

Photo Delete Icon

Delete photo/video

Click to delete photo/video.

Filter Files in Photo Album

You can filter a photo album to show only images or videos.

  • To show only videos, checkmark the Show Videos box.
  • To show only images, checkmark the Show Images box.
By default,the photo album shows all images and videos.
Image Filter Options

Delete Photo Album

Photo Album Delete Icon
Delete Photo Album Confirmaiton

Photo albums can be deleted by performing the following steps.

  1. Hover over the desired Photo Album thumbnail and click the Delete icon from the menu.
  2. The Delete Photo Album confirmation window will pop up.
  3. Click Delete and a message confirming the deletion will pop up.

Download an Entire Photo Album

An entire photo album can be downloaded by performing the following steps:

  1. Hover over the desired Photo Album thumbnail and click the Download icon from the menu.
  2. You will receive a snack bar message stating the file is being created.
  3. Check your email for a subject line reading: Your Album images are ready for download now!
  4. In the email, select the Click to Download link to retrieve the downloaded Photo Album. You’ll have seven days to retrieve this Photo Album.
Photo Album Download Icon

Renaming Photo Albums

Photo Album Rename Icon
Rename Photo Album Window
New Name for Photo Album

Photo albums can be renamed by performing the following steps.

  1. Hover over the desired Photo Album thumbnail and click the Rename icon from the menu.
  2. The Rename Photo Album window will open.
  3. Enter a new name for the photo album and click Save.
  4. The photo album will then be renamed on the Photo Albums page.

Uploading Files

You must create at least one Photo Album to upload files. If you have not, follow the Create Photo Album steps above.

Upload Files From Photo Album Page

Photo Album Upload Icon

You can either upload a photo directly from the Photo Album cover or from within the album.


To upload: Hover over the desired photo album thumbnail and click the Upload Media icon to display the Upload Media window.

Photo Album Page

Alternatively, you can click the Upload Media button while browsing inside a selected photo album to open the Upload Media window.

Upload Media Window

After clicking on either Upload Media button, the Upload Media window will appear.


Drag and drop the files you want to upload into the window, or click Browse Your Device to explore your computer folders for files.


If you selected only one file to upload, enter a name for the uploaded file.


If you have selected more than one file to upload, name entry is not an option.


Optionally: Enter a description for the image(s).


Once finished, click Upload Files. Your files are now uploaded to the photo album.

Photo Album Upload WIndow

Create Photo Album

From the Photo Albums page:

  1. Click Add Photo Album. The Add Photo Album window will open.
  2. Enter a name and click Save.

The photo album will appear in your photo albums list. See the Upload Files to Photo Album topic for detailed information.

Add Photo Album Button
Add Photo Album Window

Viewing Photos and Videos

Photo Album Page

To view an album’s photos and videos, click on a photo album.

From here, you can:

  • View individual photos or videos
  • View photo or video descriptions
  • Rename a photo or video
  • Delete a photo or video
  • Search for a photo or video
  • Upload additional photos and videos

Photo Album Media Viewer

Photo Album Media Viewer

After clicking on an image in the photo album, the Photo Album Media Viewer will display the image you selected. From here you can:

  • Zoom In / Out on an individual photo (not available for video)
  • Move to the Next or Previous photo or video
  • Markup the photo (not available for video)
  • Share the photo (not available for video)
  • Delete the photo (not available for video)
  • Increase/decrease the photo viewing area (not available for video)

Introduction

Photo Albums are used to store images or videos manually captured from a camera, as well as images uploaded directly to TrueLook from devices such as a tablet or a cell phone.


To access your Photo Albums, first select a camera to view. Then, from the breadcrumb menu, you can select Photo Albums.


There is one Photo Album page for each project, no matter how many cameras are active for the project.


Albums can hold many photos or videos, and you can create as many albums as you want for each project.

Photo Album Breadcrumb Menu Selection

From here, you can:

  • Click into a photo album
  • Rename a photo album
  • Delete a photo album
  • Upload additional photos or videos
  • Create a photo album
Photo Album Page

Project Stats

Each TrueLook project captures data on visitors who view the site.

To access this information, admins can click on the Project Stats page from the breadcrumb menu.

Project Stats Breadcrumb Menu

The data displays all days the camera has been active up to the previous day. Current-day statistics are not shown.


Below are definitions for terms found on the Project Stats page.

  • Page Views – The sum of User Views and Returning Users.
  • User Views  – The number of users that are viewing the camera for the first time. Ex.: User A, User B, and User C view the camera, then this would be a total of 3 user views.
  • Returning Users – The number of users viewing the camera again. Ex.: User A and User C return from above example. This counts as 2 returning users.
  • Minutes of Live Video – The amount of time that the live video has played across all users.
Project Stats Page

All Project Stats can also be viewed in a table format by clicking on the “View Table” button.

View Table button

Project Details

Only a Customer Admin or Project Admin can update the Project Details for their given project.

First, navigate to Camera Settings to open up the Camera Setting page that shows all of your projects and camera associated to them.


Next, select the Edit Project Settings by clicking the pencil icon. This will open the Edit Project Settings window.

Camera Settings Menu Selection
Edit Project Setting Pencil Icon

Edit Project Settings

Camera Settings Edit Project

On the Edit Project Settings window, you can change the following:

  • Select and upload a new project logo.
  • Change the project name.
  • Change the customer name (this is only different within the project and will not change the customer name for other projects or the account).
  • Change the address of the project site.
You can select "Reposition Pin" to click on the map to confirm a new project location.

Weather History

Each TrueLook project records local weather conditions based on the project zip code.


To access this information, you can click on the Historical Weather tab from the Weather page.

Reports

There are seven reports that are available. The default time period for the reports is the last 30 days. You can look back to see up to three years’ worth of historical weather information for your project.


There are many different reports available. “High vs Low Temperature” is shown here as an example.

Available Reports

  1. All – By default, a summary of all reports is shown.
  2. High vs Low Temperature – Shows trends for High and Low temperatures.
  3. Precipitation – Shows rainfall trends.
  4. Humidity – Shows humidity trends.
  5. UV Index – Shows UV Index trends.
  6. Wind Speed – Shows Wind Speed trends.
  7. Sunrise vs Sunset – Shows sunrise and sunset times.

Filtering

You can filter data using the column filtering under each column header.


Type in a keyword or click the funnel icon to expand more advanced filtering options.

Weather Filter Options

Column Sidebar

You can add or remove columns to only display those data elements you wish to analyze by clicking the Columns Sidebar.

Weather Column Sidebar

Chart Control

By default, both the chart and table are displayed on reports except the “All” report. You can turn on or turn off a chart or table using the chart control checkboxes.

Weather Chart Controls

Reset Filter

You can reset the table and chart back to its default state by using the Reset Filter button.

Weather Filter Reset

Export

You can export the chart and table for any report by clicking the Export button.

Weather Export Button

Current Weather

Once you have selected a camera to view, you can then select the Weather page. There is one Weather page for every project, no matter how many cameras are active for each project.


The Current Weather tab shows the following:

  • Today’s Summary
  • Radar
  • Hourly Forecast
  • Conditions
  • 14-Day Forecast
Weather window

Radar

You can use the Radar to gain more insights into today’s weather conditions for your project’s area.

Hourly Forecast

You can scroll through the Hourly Forecast to see the conditions for the project’s location on an hour-by-hour basis.

14-Day Forecast

You can expand the 14-Day Forecast card to see the forecast for a given day.

Severe Weather Alerts

If your project’s location has a severe weather alert, you will see that at the top of the Hourly Forecast section.

Introduction

You can access Weather from the breadcrumb menu for insights into current and historical weather.

Breadcrumb Menu - Weather

You can set your displayed temperature to either Fahrenheit (°F) or Celsius (°C).


This can be done via your Account → Preferences. You can then toggle between the two options and click “Update” to save changes.

Recent Image Slideshows

Recent Image Slideshows allow you to view multiple jobsites simultaneously. Set up a live stream that automatically rotates between other cameras, or a slideshow that updates itself by taking pictures from the jobsite.


Access Recent Image Slideshows from the top-right gear icon. Select Sharing Center, and select Recent Image Slideshow from the upper-left tabs.


Note: You must have administrator permissions to access the sharing center. If you’re unable to access the sharing center, contact your account administrator.

24x7 Rotating Stream is an add-on available for Advanced or Premium subscription cameras. This allows you to create a multi-camera slideshow that swaps between cameras. Contact your Sales or Customer Service representative for more information.

Create a Recent Image Slideshow

To start, click the Recent Image Slideshow button. This brings up the Recent Image Slideshow window.

Recent Image Slideshow button

Configure the options of your Recent Image Slideshow on the left side of the window.


  • Slideshow Name: The name for the slideshow.
  • Start/End hour: Choose the hours of the day the slideshow can be accessed.
  •  Day of week: Choose the days the slideshow can be accessed.
  • Select layout type: Layout of how the camera(s) appear to a viewer.
  • Misc. Options:
    • Full Screen: Slideshow will automatically take the full size of the browser screen.
    • Show project name: Shows project name on the slideshow.
    • Show camera name: Shows the camera’s name on the slideshow.
    • Show Project Location: Shows the city and state from the camera’s address.
Live Slideshow Configuration
  • Set Expiration: Choose a day for slideshow link to expire. Note that it’ll expire at 11:59 PM Eastern Time the day of expiration. 
  • Stream Timer: Amount of time before the slideshow changes.
  • Optional Password: Require a visitor to enter a password to access the slideshow.
  • Enable recent image slideshow link: Makes the slideshow accessible or inaccessible.
  • Optional Logo: Can select a logo image that’ll be included in the slideshow.
Live Slideshow Configuration

On the right side of the window, you can search for your camera(s) to include in the slideshow:

  • You can search for a project or camera by entering at least three characters in the Search bar.
  • Projects are listed alphabetically under the Media Source header.
    • You can use the upward/downward arrows to expand the project row to access cameras per project
    • Below the project rows are the applicable cameras. Click the checkbox next to each camera to select it.
When there is no media available, an icon will appear with one of the following explanations: “No media,” “No time lapses,” or “No photo albums.”
Live Slideshow Media Source

As you select camera(s), they will appear in the Slideshow Cards section at the bottom of the window.


Remove media from the slideshow by clicking the trash can icon. Rearrange the slideshow with the “Rearrange Slides” button.


Arrows will appear on the left and right side of the Slideshow Cards section to navigate between the selected media.

Live Slideshow Slides

When finished, click Save.


The following confirmation message will display, and the slideshow link is created.

Recent Slideshow Created confirmation

When a new slideshow link is created, a blue dot will appear next to the new Slideshow Link for visibility amongst other links on the table.

New Slideshow Listing
Only one live stream slideshow link can be active at any given time. If more than one live stream slideshow link is needed, contact support@truelook.com. You can have as many recent image slideshows as you want.

Ellipses Options

You can disable or enable access for a sharing link by using the toggle option in the Available column.

Slideshow Availability Toggle On-Off

When you disable access for a slideshow link by using the toggle option, the toggle will appear in the grey state and a confirmation message displays.

Recent Slideshow Not Active confirmation

When you activate access for a slideshow link by using the toggle option, the toggle will appear in the green state and a confirmation message displays.

Recent Slideshow Active confirmation

Menu Options

Click the ellipses menu from the Recent Image Slideshow table and view the options: Edit, Copy Link, Embed Code, Duplicate, and Delete.

Sharing Link Edit Menu

To edit an existing sharing link, click Edit and the Edit Recent Image Slideshow window will open.


You can make any changes, then click Save once finished. When you save the edits, a confirmation message will appear.

Edit Recent Slideshow window

You can copy a slideshow link to send to intended visitors.


When you click Copy Link, a confirmation message will appear when the link has been copied to your clipboard.

Recent Slideshow Link Copied confirmation

You can embed your slideshow into your website to share the camera with visitors.


Find the Recent Image Slideshow link you’d like to embed and click Embed Code from the menu to open the HTML code window.


Click the Copy button to copy the displayed HTML code to your clipboard. Then, provide the HTML code to your web developer to add to your website.

The code will work as long as the sharing link is active. If the sharing link is deleted, disabled, or expired, your embed code will no longer work.
Embed Code Window

Slideshow Links

You can create links that lead directly to your slideshows with no login required. This is useful in instances where you’d like to share a slideshow with the public, display it in your lobby, email it to a group of stakeholders, etc.


If you later want to revoke access to that link, you can delete or disable the link. You also have the ability to set an expiration for the slideshow link and it will automatically disable access on that day.


Each slideshow requires a name. We recommend choosing a name that’ll help you differentiate slideshows, such as naming them after the projects included or the audience you plan to send it to. Just like with users, slideshow links lets you define what the viewer of this link will have access to see.

Note:You can create a single slideshow link with media from multiple cameras and/or projects.

Create New Standard Slideshow Link

Click Standard Slideshow to create a new Standard Slideshow link. This brings up the Standard Slideshow window.

Create Standard Slideshow button
Create Standard Slideshow Window

Configuring Your Slideshow

To configure your slideshow link, the fields are:

  1. Slideshow Name: The name for the slideshow.
  2. Set Expiration: Select an expiration date from drop-down.
    • A sharing link will expire at 11:59 PM if you select 1 Day, 2 Days, or Specific Day as the Set Expiration field.
    • When you select multiple cameras/projects, an information icon will appear with a tooltip message: “Sharing Links with multiple cameras or projects located in different time zones will expire at 11:59 PM EST time.”
  3. Optional Password: If you want your slideshow link to require a password to view, enter that here.
  4. Enable Standard Slideshow link: Enable or disable the slideshow link once created.
  5. Choose an optional logo: Select a logo from any of your projects.
Standard Slideshow Configuration Options

Choosing Your Time-Lapses and Photos

Select at least one media source (photo albums, time-lapses) to include in your slideshow. You can search for a camera or project by entering at least three characters in the search bar. 


Projects are listed alphabetically in the rows under the Media Source header. You can use the upward/downward arrows to expand the project row to access cameras per project.


Below the project rows are the Time-Lapses and Photo Albums rows. Within each Time-Lapse row, you can locate each camera. Within each Photo Album row, you can locate each Photo Album per project.


Click the checkbox to select any time-lapses and select the photos from any album through the “Select Files” button.

When there is no media available, an icon will appear with one of the following explanations: “No media”, “No time lapses”, or “No photo albums”.
Standard Slideshow Media Source Options

Slideshow Cards Section

As you select the media source(s), the selected media appears in the Slideshow Cards section.


Remove media from the slideshow by clicking the trash can icon.

 Rearrange the slideshow with the “Rearrange Slides” button.


Arrows will appear on the left and right sides of the Slideshow Cards section to navigate between the selected media.

Live Slideshow Slides

When finished, click Save.


The following confirmation message will display, and the slideshow link is created.

Standard Slideshow Created notification

When a new slideshow link is created, a blue dot will appear next to the new Standard Slideshow Link for visibility amongst other links on the table.

New Standard Slideshow Listing

Availability Options

You can disable or enable access for a sharing link by using the toggle option in the Available column.

Slideshow Availability Toggle On-Off

When you disable access for a slideshow link by using the toggle option, the toggle will appear in the grey state and a confirmation message displays.

Standard Slideshow Inactive

When you activate access for a slideshow link by using the toggle option, the toggle will appear in the green state and a confirmation message displays.

Ellipses Options

Click the ellipses menu from the Standard Slideshow table and view the options: Edit, Copy Link, Embed Code, Duplicate, and Delete.

Sharing Link Edit Menu

To edit an existing sharing link, click Edit and the Edit Standard Slideshow window will open.


You can make any changes, then click Save once finished. When you save the edits, a confirmation message will appear.

You can copy a slideshow link to send to intended visitors.


When you click Copy Link, a confirmation message will appear when the link has been copied to your clipboard.

Standard Slideshow Copied notification

You can embed your slideshow into your website to share the camera with visitors.


Find the Standard Slideshow link you’d like to embed and click Embed Code from the menu to open the HTML code window.


Click the Copy button to copy the displayed HTML code to your clipboard. Then, provide the HTML code to your web developer to add to your website.

The code will work as long as the sharing link is active. If the sharing link is deleted, disabled, or expired, your embed code will no longer work.
Embed Code Window

When a slideshow link is no longer needed, it can be deleted.


Selecting Delete from the menu opens the Delete Slideshow Link prompt to confirm your decision. When you select Delete, the sharing link will no longer be accessible and will no longer display on the Sharing Center table.


A confirmation message will appear when the sharing link has been deleted.

Reminder:There is an option to disable a sharing link to temporarily revoke access.
Standard Slideshow Delete Confirmation
Standard Slideshow Deleted notification

Sharing Links

Sharing Links bypass the login requirement and go directly to the camera interface. This is useful in instances such as sharing your camera with the public or emailing the camera to a group.


If you later want to revoke access, you can delete or disable the link and it will no longer work. You also have the ability to set an expiration for the sharing link which will automatically disable access.


Naming sharing links helps differentiate the permission structures of each link. Just like with users, sharing links let you define what the viewer of this link has access to.

You can create a single sharing link with access to multiple cameras and/or projects.

Creating a Sharing Link

Clicking “+ Sharing Link” will open a window of options. There you can enter details, select cameras, and configure access.


The mandatory fields are:

  1. Sharing Link Name
  2. Select Cameras: Requires at least one camera (which can be any active, completed, or offline camera).
  3. Camera View: Select from the drop-down.
  4. Camera Interaction: Select camera interaction type (e.g., none, presets only, or full access).
  5. Expiration: Select from drop-down.
  6. Time Lapses: Toggle on to share time-lapses.
  7. Photo Albums:  Toggle on to share photo albums.
Adding notes is optional, but available.
Sharing Link Button
Create Sharing Link Window

Select Cameras Section

Enter at least three characters to search for a camera or project name. Projects will be listed alphabetically in the rows below the Select Cameras section. You can use the arrow next to the project name to select specific cameras in that project. Click the checkbox next to the camera thumbnail to include that camera in the sharing link.


Each camera thumbnail has a status bar on the left side.

  • Green: Active/Enabled
  • Red: Offline
  • Gray: Completed
Select Cameras Window

Configure Access Section

  1. Camera View: Access only the most recent image, only show images, or images and videos with the camera.
  2. Camera Interaction: The allowed camera interactions between none, presets only, or full control.
  3. Expiration: Choose when the link expires and is unable to be used to access the camera(s). A sharing link will expire at 11:59 PM ET on the day you set it to expire, regardless of the camera’s time zone.
  4. Time Lapses: Toggle on to share time-lapses.
  5. Photo Albums:  Toggle on to share photo albums.

When finished, click Save. You’ll receive a confirmation message.

Configure Access window
Create Sharing Link Snackbar Message

Enable or Disable a Sharing Link

You can disable or enable access for a sharing link by using the toggle option in the Available column.


When you disable access for a sharing link, the toggle will appear gray and a confirmation message will display.


When you activate access for a sharing link, the toggle will appear in the green state and a confirmation message will display.

Disable Link Snackbar Message
Button Toggle States
Activate Link Snackbar Message

Ellipses Options

Click the ellipses option from the Sharing Center table and view the options: Edit, Copy Link, Embed Code, Duplicate, and Delete.

Sharing Link Edit Menu

To edit an existing sharing link, click Edit and the editing window will open.


You can make any changes, then click Save once finished.

Edit Sharing Link Window

You can copy a sharing link to send to intended visitors.


When you click Copy Link, a confirmation message will appear when the link has been copied to your clipboard.

Copied Snackbar Message

You can embed your camera view into your website to share the camera with visitors. Find the sharing link you’d like to embed and click Embed Code from the menu to open the HTML code window. Click the Copy button to copy the displayed HTML code to your clipboard. Then, provide the HTML code to your web developer to add to your website.

The code will work as long as the sharing link is active. If the sharing link is deleted, disabled, or expired, your embed code will no longer work.
Embed Code Window

You can duplicate an existing sharing link to replicate the information on the original link.


When you click on the Duplicate option, a window will open. You have the ability to edit the information further before saving the new sharing link.

When a sharing link is no longer needed, it can be deleted.

Selecting Delete from the menu opens a prompt to confirm your decision. When you select Delete, the sharing link will no longer be accessible and will no longer display on the Sharing Center table.


A confirmation message will appear when the sharing link has been deleted.

Reminder:There is an option to disable a sharing link if you’d like to temporarily revoke access.
Delete Sharing Link
Delete Sharing Link Snackbar Message

Introduction

You can access the Sharing Center by clicking the gear icon in the upper-right of the dashboard.

To view the Sharing Center and Camera Settings, you must be either a Customer Admin or Project Admin. If it is not displaying for you, contact your administrator for updated access.
Settings Menu Sharing Center Highlighted

Filtering

Filter Options
Column Sidebar

Each column has filtering options under each header of the chart (e.g., Projects, Camera, Created By, etc.).


Type in the text box to search the list, or click the funnel icon to expand more advanced options.


The arrows next to the header allow you to sort either highest to lowest or lowest to highest. Reset filters with the “Reset Filter” button.


Additional options to add or remove columns from view can be found by clicking on Columns on the left side of the Sharing Center chart.

Row Grouping

Row Grouping

When there is a slideshow link with multiple projects or cameras, the row grouping feature will appear.


Row grouping allows rows to be grouped by columns with the grid performing a ‘group by’ operation on the rows. The row grouping filter displays the number of cameras within each project, allowing you to expand the project and camera rows.


When a project or camera row is in the expanded position, the rows will appear on a green background.

Save to Procore or Autodesk

Share to Procore Window

With a Procore or Autodesk integration, a photo can be shared manually using the sharing window.


First, click on the “Share” button, then select the Procore or Autodesk button. These require a previously configured Procore and/or Autodesk integration.


Select the project you want the image to be associated with, write any comments you’d like, and click “Share.”

If the Procore or Autodesk buttons do not show up, make sure the integration was set up properly.

Share to Facebook or Linkedin

Any image can be shared to your Facebook or LinkedIn from within TrueLook.


First, click on the “Share” button, and then click on “Share to Facebook” or “Share to LinkedIn.” You may be prompted to authenticate your login credentials before you can share the image to either platform.

Share to Facebook Window

Markup Image

While in Live View, you can mark up any image. To do this, select the “Share” icon from the side control panelthen select “Markup Image.” You’ll be taken to a page where you have several tools to draw and add text to the image.


Once you have added your markups, you can save the image to a photo album or share it via email. If the Procore integration is set up on your account, you can also submit a Procore RFI. These options are available from the vertical ellipsis in the top right corner.

Image Markup

Share Email

Share Email

While in Live View, you can share any image via email. To do this, select the “Share” icon from the side control panelthen select “Share Email.”

You’ll then be prompted to enter:

  • An email address
  • A subject line
  • A message

Once you’ve completed these fields, select “Send.”

Save to Photo Album

You can save your images to a chosen photo album. To do this, select the “Share” icon from the side control panelthen select “Save to Photo Album.”


You’ll then be presented with a list of your photo albums that you can add your image to. Once you have selected your album(s), click “Save.”

Photo Album Window

Introduction

Sharing on the TrueLook platform is easy!


When you click the “Share” button, it will open the following options:

  • Save to Photo Album
  • Share via Email
  • Markup an Image
  • Download Image or Video
  • Share on Facebook or LinkedIn
  • Share to Procore or Autodesk (if either integration is set up)
Share Window

TrueAI Site Activity Dashboard

Accessing the TrueAI Site Activity Dashboard

The TrueAI Site Activity Dashboard can be accessed from two places, the device dashboard and the camera view.

  1. From Device Dashboard: Click the AI icon on the camera of your choice.
  2. While viewing a camera: Click the Live menu at the top of the screen and select TrueAI Dashboard.

The Site Activity dashboard compiles and organizes jobsite activity into charts and graphs.

  • Objects Detected – The total number of objects detected each day (pedestrians + vehicles).
  • People Detected – The number of pedestrians detected each day.
  • Vehicles Detected – The number of vehicles detected each day. Some cameras will categorize vehicle types (cars, trucks, bikes, etc.).
  • Vehicle Types – The different vehicles seen over a specified date range.
  • People Forecast – A trend chart of people detected each day and an estimate for how many people will likely be detected each day.
  • People by Hour – Heatmap for when people were on the jobsite each hour each day. The colors represent how many people were there each hour.
TrueAI Dashboard charts

Adjusting TrueAI Site Activity Dashboard Timeframes

Select chart and graph date ranges by clicking the arrow on the left of the charts.


Use the options to select the time range of data included and shown in the charts and graphs. 

TrueAI date filters

TrueAI Site Activity Overlay

To add TrueAI to your account,contact your TrueLook sales representative.

TrueAI Site Activity provides insights and data about your jobsites using your TrueLook Camera. TrueAI can be viewed either live with AI Overlay, or compiled as charts and graphs on the TrueAI Dashboard.

Activating Site Activity AI Overlay

Select a TrueAI-enabled camera from your dashboard. TrueAI-enabled cameras are marked with the AI icon. 

Once on the camera view, click the Start AI Overlay button on the right. This will start a live stream of your camera to launch AI Overlay.

Your top-left corner now shows a count of each object AI sees.

Note:Only certain cameras can categorize the type of vehicle, designated by an asterisk (*).
TrueAI Walk icon

People

Any pedestrians on foot (excludes bikes).

TrueAI Vehicle icon

Vehicles

Total of all vehicles.

TrueAI Bus icon

Buses*

Or any similar multi-person vehicle (e.g. trains).

TrueAI Car icon

Cars*

Any vehicles smaller than what fits into the truck category (see Trucks below).

TrueAI Scooter icon

Bikes*

Any two-wheeled vehicles (i.e., bicycles and motorcycles).

TrueAI Truck icon

Trucks*

Any large-sized trucks (e.g., semi, delivery, dump, tanker, etc.)

Play Security Recordings

After fetching security recordings, you can play them by clicking directly on the thumbnail. Once you have selected a security recording, you will be taken to the video viewer.

Security Recordings Movie Viewer

Security Recording movie viewer

The video viewer allows you to:

  • Pause or play the video
  • Advance forward or backward through the video
  • Speed up or slow down the playback
  • Determine when motion activity was detected
  • Expand the video to full screen
  • Play the next or previous video from that day if others have already been downloaded (fetched)

Motion events within a video are shown in red on the playback bar. Each motion event will have a marker within the 10-minute video.


Fetching Security Recordings

Watch the video or continue reading below the video to learn about fetching security recordings.

To download (fetch) video from the camera’s memory, click on the “fetch recording” icon on the particular recording thumbnail you would like to download.

Security Recording Fetch button

The recording will then begin to download from the camera’s memory.

Security Recording Downloading icon

Once the icon changes to a play button, the recording is now stored within your TrueLook account for viewing.


You can now share the recording or download it to your local computer using the buttons in the bottom right.

Security Recording Play button

Introduction

Every TrueLook Camera records 24/7.


Recordings are stored in 10-minute intervals. These 10-minute recordings make up the security recordings for your camera.


The video captured is saved on the camera and, depending on your subscription, is available for up to 90 days. At that time, the oldest footage is overwritten with newer footage.

Security Recordings Page

Select a camera to view. Once you have selected a camera, you can then select the “Security Recordings” page from the breadcrumb menu.

This will take you to the security recordings page.

If you cannot see your Security Recordings,your IT department may need to whitelist access to our storage servers: "*.s3.wasabisys.com". They can verify if your network’s DNS can resolve the domain by testing "truelook-media-003.s3.wasabisys.com."
Breadcrumb menu with Security Recording highlighted

From this page, you can see all the available recordings for this camera, and whether you have already fetched them or they are just in the camera’s memory.


On the right side of the page, the security recordings are shown in chronological order for the particular day you are on. If it is the current day, you will always see the most recent recording at the top, and you can scroll down to see the rest of the day. On past days, you will see midnight to midnight for that particular day.

Security Recording page

Security Recordings Filters

On the left side of the page is the security recordings calendar. This shows you what types of recordings are available for any particular day.


The calendar shows light green, dark green, or split colors on the dates.

  • If a day is entirely light green – Those days only have recordings in the camera’s memory
  • If a day is entirely dark green – Those days have had all the recordings downloaded (aka “fetched”) from the camera for that day.
  • If a day is both light green and dark green – Those days have some downloaded (fetched) recordings, plus recordings available for download in the camera’s memory.
Security Recording calendar

Security Recordings Filter

Security Recording calendar filters

At the top of the calendar are two filters that can be applied to the page. By default, both filters are unchecked.

  • Show fetched recordings – By checking this, the calendar will only show days with fetched recordings. Fetched recordings are the 10-minute videos downloaded from the camera to your TrueLook account. We recommend leaving footage on the camera unless you need to see a specific event. Depending on your subscription, download video is saved for a year minimum on our servers.
  • Show only videos with events By checking this, the calendar will only show you days with videos that have had a motion event. It will show both fetched videos and videos in the camera’s memory.
  • If you select both filters, you’ll only see fetched videos that have motion events.

Final Time-Lapse Email Preferences

By default, the final time-lapse video will be sent to all users associated with your project. To find your Final Video Preferences:

Adjust settings on a current project

  1. Go to Settings → Camera Settings
  2. Locate the desired project and click the Pencil icon located next to its name
  3. Click the Preferences tab in the new window
  4. You will see the window for Final Video Preferences

Adjust default settings when new projects are created (Customer Admins only)

If you want new default settings when creating a new project, Customer Admins can change the settings with the instructions below.


Changing default settings does not work retroactively. This only works for projects created after saving the new default settings. Follow the Adjust settings on a current project instructions above to adjust your settings on a project that already exists.

  1. Go to Settings → Customer Details
  2. Click the Preferences tab
  3. You will see the window for Final Video Preferences
Final Video Preferences

You can choose from the following options in the Send Final Project Video dropdown.

  • Send email to all project users – emails all users associated with the project
  • Do not send any emails – no emails are sent
  • Send email only to users – emails only the users you choose

Additionally, the variance allowance can be adjusted. The automation reviews each image and if an image is a certain percent different from the majority of other images in the time-lapse (e.g., due to a moved camera), it’ll exclude those from the final video.

Other effects can be selected or deselected for further fine-tuning.

Re-Render Time-Lapse Videos

Time-lapse videos are automatically rendered every night. If you need to render a new version immediately, you can use the “Re-Render Video” option from the Tool Bar menu by hovering over the time-lapse.


Once you select “Re-Render Video,” the videos in the selected time-lapse will begin to render immediately. Depending upon how many images are in the time-lapse and the settings you selected (e.g., “Render in 4k”), the process may take some time.

Re-Render Movie button

When the render is complete, you will receive a Notification.


If you click on the message, it will take you to the time-lapse page so you can view your newly rendered video.

Create Custom Time-Lapse Videos

Time-lapse videos stitch the individual images captured in your time-lapses, and speed them up to create a video that shows your project’s progress in a condensed format.


Time-lapse videos can include background music, use images from a specific date range, and offer other options for a highly customized video. 

New Time-Lapse Movie

New Video

To create a new video from your time-lapse photos, navigate to your desired time-lapse. Click the six-dot icon on the thumbnail to expand the toolbar menu. Then, select “New Time-Lapse Video” to open the new video window.

New Time-Lapse Movie

After opening the new video window, complete the fields requested.

  • Name – Name your video (e.g. Northside Footing Pour).
  • Images – Specify if you want to use all the images you have captured so far, or a specific date range.
  • Max Length – This controls both the speed of the video and how many images per second. For example, if you have 298,000 images and only want a 1-minute video, it will automatically drop images to maintain a frame rate of 60 frames-per-second.
  • Select Music – Choose the music to play in your video. You can hear a sample of the selected music by clicking “Play sample.”
  • Effects
    • Exclude Weekend Images – Removes any images taken during weekends. Useful if there’s no work on weekends to remove lags in the video.
    • Exclude Night Images – Removes images taken after sunset. Useful to avoid images that may be too dark.
    • Exclude Bad Weather Images – This removes any images with rain, snow, fog, etc..
    • Daily mode – Selects one image per day, taken around noon.
    • Watermark with Logo – Adds your logo (if uploaded on the customer details page) as a watermark in the video.
    • Render in 4k – Renders the video in high-definition 4k.
Time-Lapse New Movie window
Scroll to Top