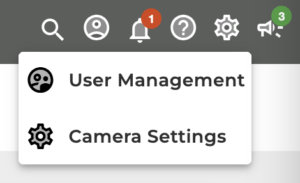
The Camera Settings page allows administrators to configure different settings for each camera. It can be found by clicking Settings (the gear icon) in the upper right corner of the dashboard and selecting Camera Settings.
Camera Settings Page
For Customer Admins the Camera Settings page is a single page management screen for all your cameras.
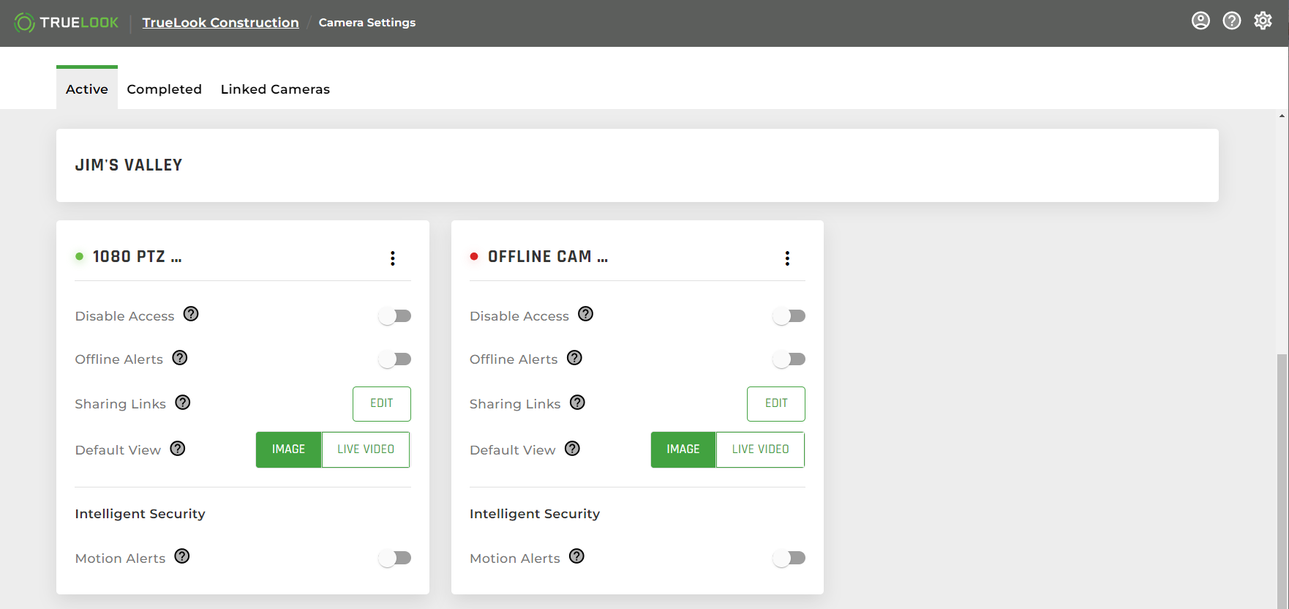
From here you can:
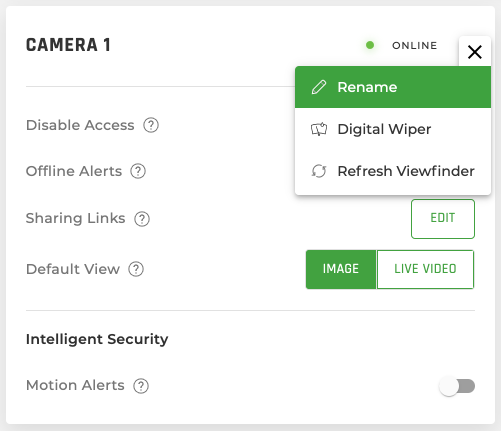
- Rename Camera: Allows you to rename the camera (from the Vertical Eclipsys).
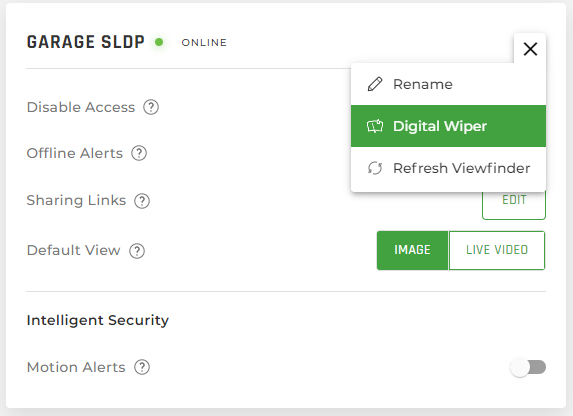
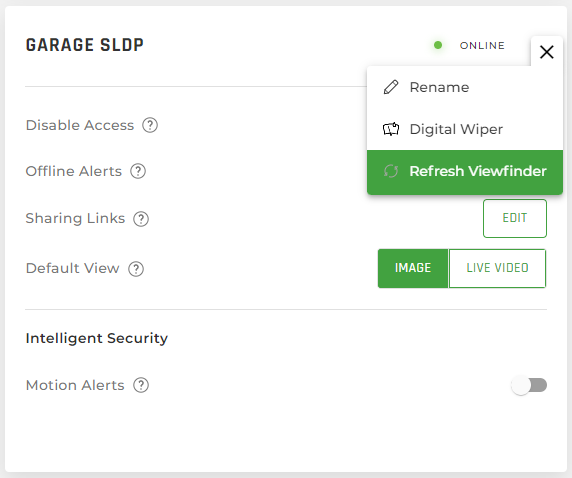
- Digital Wiper: Allows you to clear off rain droplets that may be obscuring the view of the camera lens (from the Vertical Eclipsys).
- Note: Certain PTZ (pan-tilt-zoom) cameras only.
- Refresh Viewfinder: Takes a series of images from the full field of view to create the Viewfinder image you see on the live view page (from the Vertical Eclipsys).
- Note: PTZ (pan-tilt-zoom) cameras only.
- Focus: Allows you to refocus a camera that may be out of focus (from the Vertical Eclipsys).
- Disable Access: Users who are not admins will not have access to the camera from the dashboard.
- Offline Alerts: System will send emails to admins when the camera is offline and no longer capturing images.
- Sharing Links: Links will go directly to the camera interface, bypassing the login requirement.
- Default View: Allows you to decide which view is shown by default on Live View.
- Intelligent Security: Allows administrators to configure:
- Notifications for Motion Alerts via email, SMS or both.
- Note: See the Enable Motion Alerts topic for detailed information.
Rename Camera
Find the camera you want to rename and from the camera panel, click Vertical Ellipses > Rename.
Enter the new camera name and click Save. The new name will be displayed anywhere the camera is shown.
Digital Wiper
The Digital Wiper option will only appear if your PTZ camera has this feature. The digital wiper allows you to clear off rain droplets that may be obscuring the view of the camera lens. When the digital wiper has been initiated, you will see what appears to be a shaking movement. This is the camera quickly shaking to “wipe” the water off. The shaking movement only lasts for a few seconds.
Find the camera you want to wipe off (clear) and from the camera panel, click Vertical Ellipses >Digital Wiper.
The following confirmation message displays and the digital wiper is initiated.
Refresh Viewfinder
PTZ (Pan-Tilt-Zoom) cameras take a series of images from the full field of view to create the Viewfinder image you see on the live view page. This set of images sometimes needs to be retaken.
Find the camera you want to refresh the viewfinder for and from the camera panel, click Vertical Ellipses > Refresh Viewfinder.
Focus
This option lets you refocus a camera that may be out of focus.
Find the camera you want to focus and from the camera panel, click Vertical Ellipses > Focus for that camera.
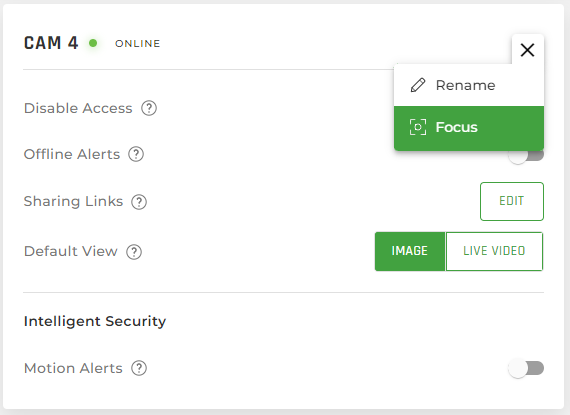
A confirmation message displays and the refocus camera request is sent.
Disable Access
If needed, admin users can disable all access to a camera. This will not affect other projects or cameras.
NOTE: If disable access is toggled on, only admin users will be able to access the camera from the dashboard. The camera will still capture time-lapse images (if configured), as well as security recordings, but no other users will be able to view the camera or any saved images from the camera.
Find the camera for which you want to disable access and, from the camera panel, click the Disable Access toggle. The following confirmation message displays and camera access is disabled.

Offline Alerts
A camera may occasionally go offline. You can set up offline alerts so admins will automatically be notified by email alert if the camera goes offline and is no longer capturing images. Note that if you do not have any active time-lapses, the alerts will not function.
NOTE: If the admin user is unable to solve the issue, email TrueLook support at support@truelook.com or call 833.878-3566, option #2.
Find the camera you want to set up offline camera alerts for and from the camera panel, click the Offline Alerts toggle. An Edit button appears and is enabled.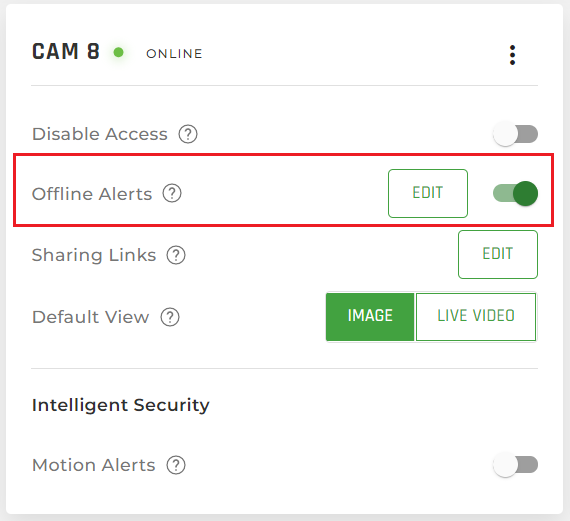
Click Edit. The Offline Alerts window displays.
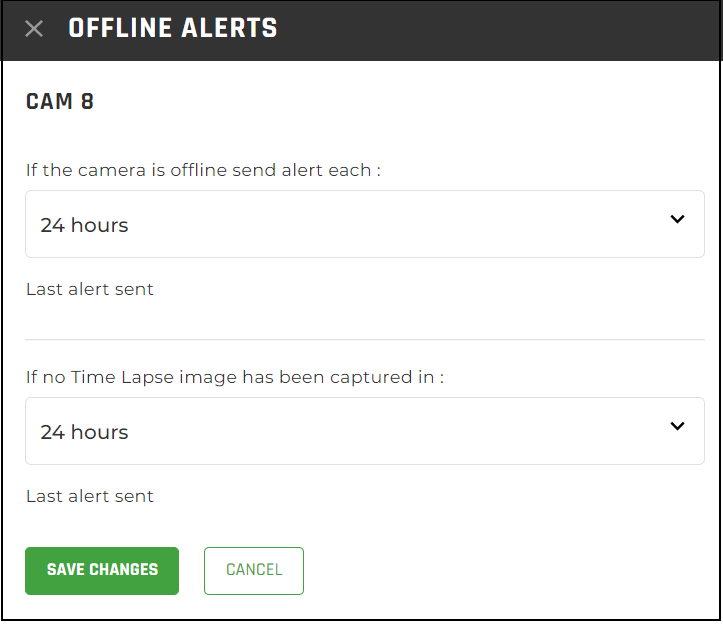
Enter/select the following information:
- If the camera is offline send alert each: Choose time period from drop-down.
- If no Time Lapse image has been captured in: Choose time period from drop-down.
When finished, click Save Changes. The following confirmation message displays and the offline alert is enabled.

Intelligent Security
TrueLook’s Intelligent Motion Alerts let you configure notifications via email, SMS or both.
NOTE: Fence Guard and Motion Guard are now only available on select camera models. Please reach out to support@truelook.com and we will adjust the settings for you.
All TrueLook cameras record security video footage 24/7 and detect when motion is captured by the camera. Admin users can set up custom motion alert notifications via email, SMS, or both to be sent to anyone who needs to know about detected motion.
Typically, this is to alert you to activity that is not supposed to be happening like someone on the jobsite at night when nobody is working.
NOTE: It is recommended to only set motion alert windows for when there should be no activity on the jobsite. For example, a motion alert schedule for weekdays would likely be between the hours of 5 PM (when employees go home for the day) and 7 AM (when employees start showing up to work again).
Find the camera you want to activate motion alerts for, and toggle Motion Alerts On. An Edit button appears and is enabled.

Click Edit. The Motion Alerts window displays.
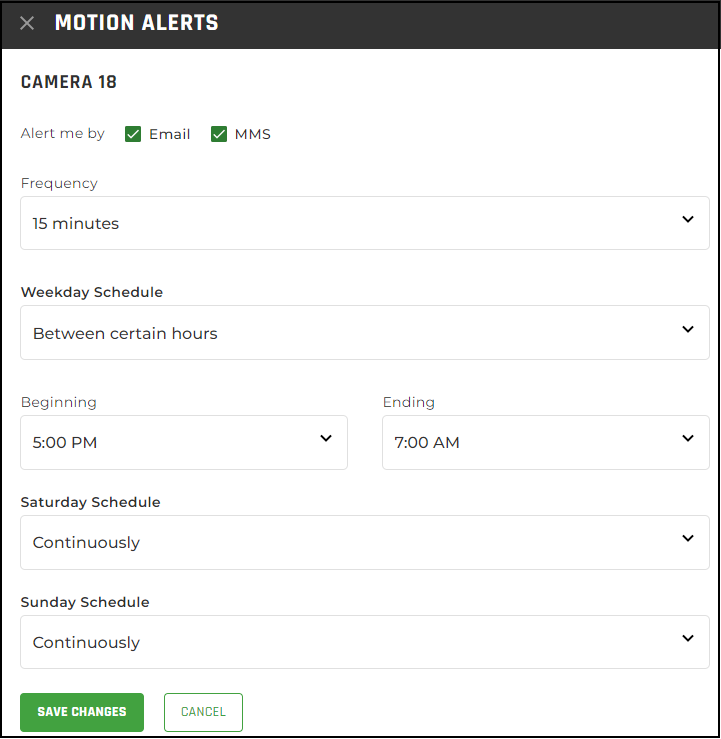
Enter/select the following information:
Alert me by: Notification type.
- Frequency: Choose time period. This determines how frequently you will receive motion alerts (e.g., 15, 30 mins., 1 or 2 hours, etc.).
NOTE: If frequency is set to every 30 minutes, then after first motion alert is sent, another alert is sent for any activity after 30 minutes has passed. We recommend keeping this frequency-time low to start with and adjust as needed. - Weekday schedule and weekend schedule: Set schedule type you want to receive motion alerts for during the week and weekend (e.g., Never, Continuously, Between certain hours).
IMPORTANT: If continuously is selected, you will receive motion alerts 24/7 when any motion is detected. If Between certain hours is selected, you must enter the beginning and ending hours.
When finished, click Save Changes.
Sharing Center
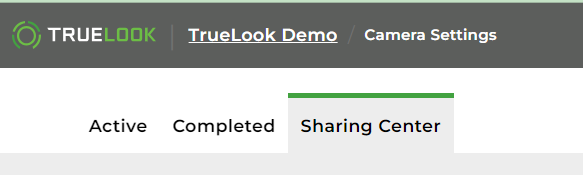
To access the Sharing Center on any page, click the gear icon in the top right. On the Camera Settings page, simply switch to the Sharing Center tab.
![]()
Sharing Center Table
To view the Sharing Center, you must have one of the following roles in the TrueLook Platform: customer admin, project admin, or custom access with permission to view Camera Settings. If it is not displaying for you, contact your administrator for updated access.
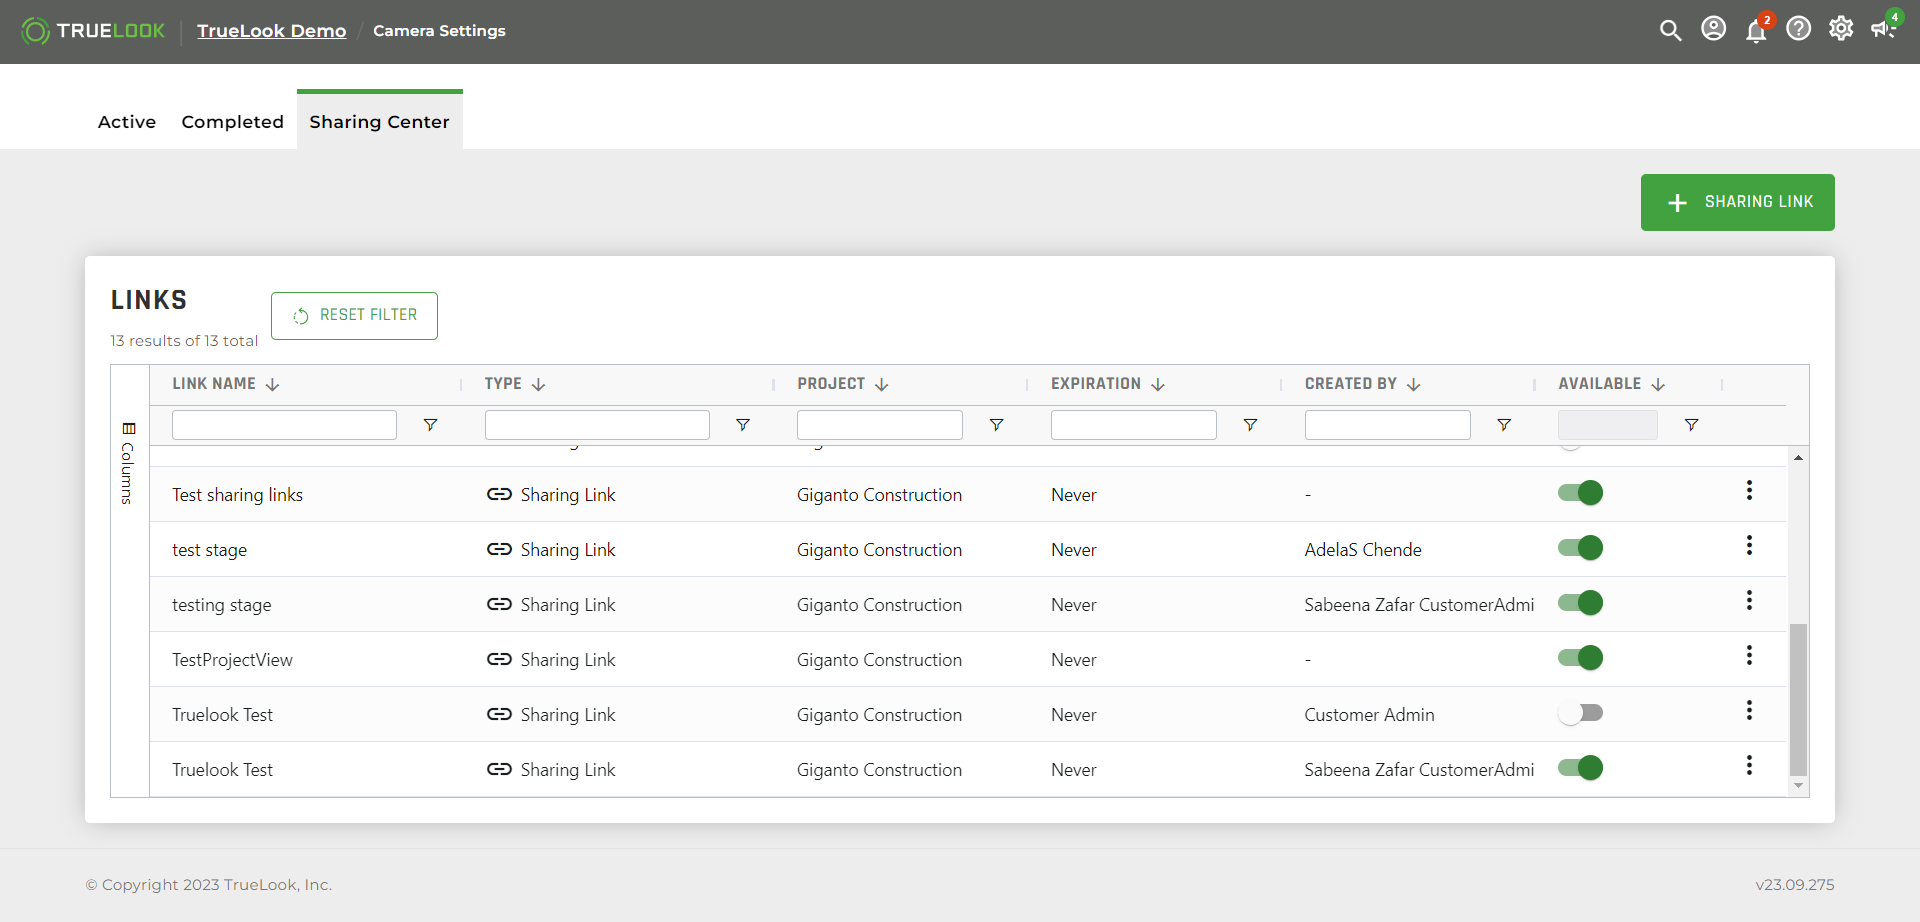
Filtering
Each column has filtering options next to and under the header. You can type to search the list or click the funnel icon to expand more advanced options. The arrows next to the header allow you to sort either highest to lowest or lowest to highest. Reset filters with the “RESET FILTER” button.
![]()
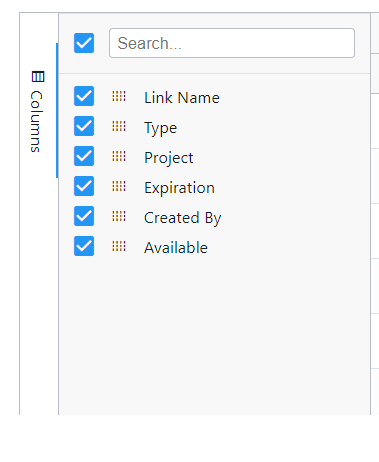
Column Sidebar
You can add or remove columns from view by clicking the columns sidebar
Sharing Links
Sharing Links bypass the login requirement and go directly to the camera interface. This is useful in instances such as sharing your camera with the public or emailing the camera to a group. If you later want to revoke access, you can delete or disable the link and it will no longer work. You also have the ability to set an expiration for the sharing link which will automatically disable access.
Naming sharing links helps differentiate the permission structures of each link. Just like with users, sharing links let you define what the viewer of this link will have access to.
NOTE: You can create a single sharing link with access to multiple cameras and/or projects.
Create a Sharing Link
Click + Sharing Link. Then, you can enter details, select cameras, and configure access.

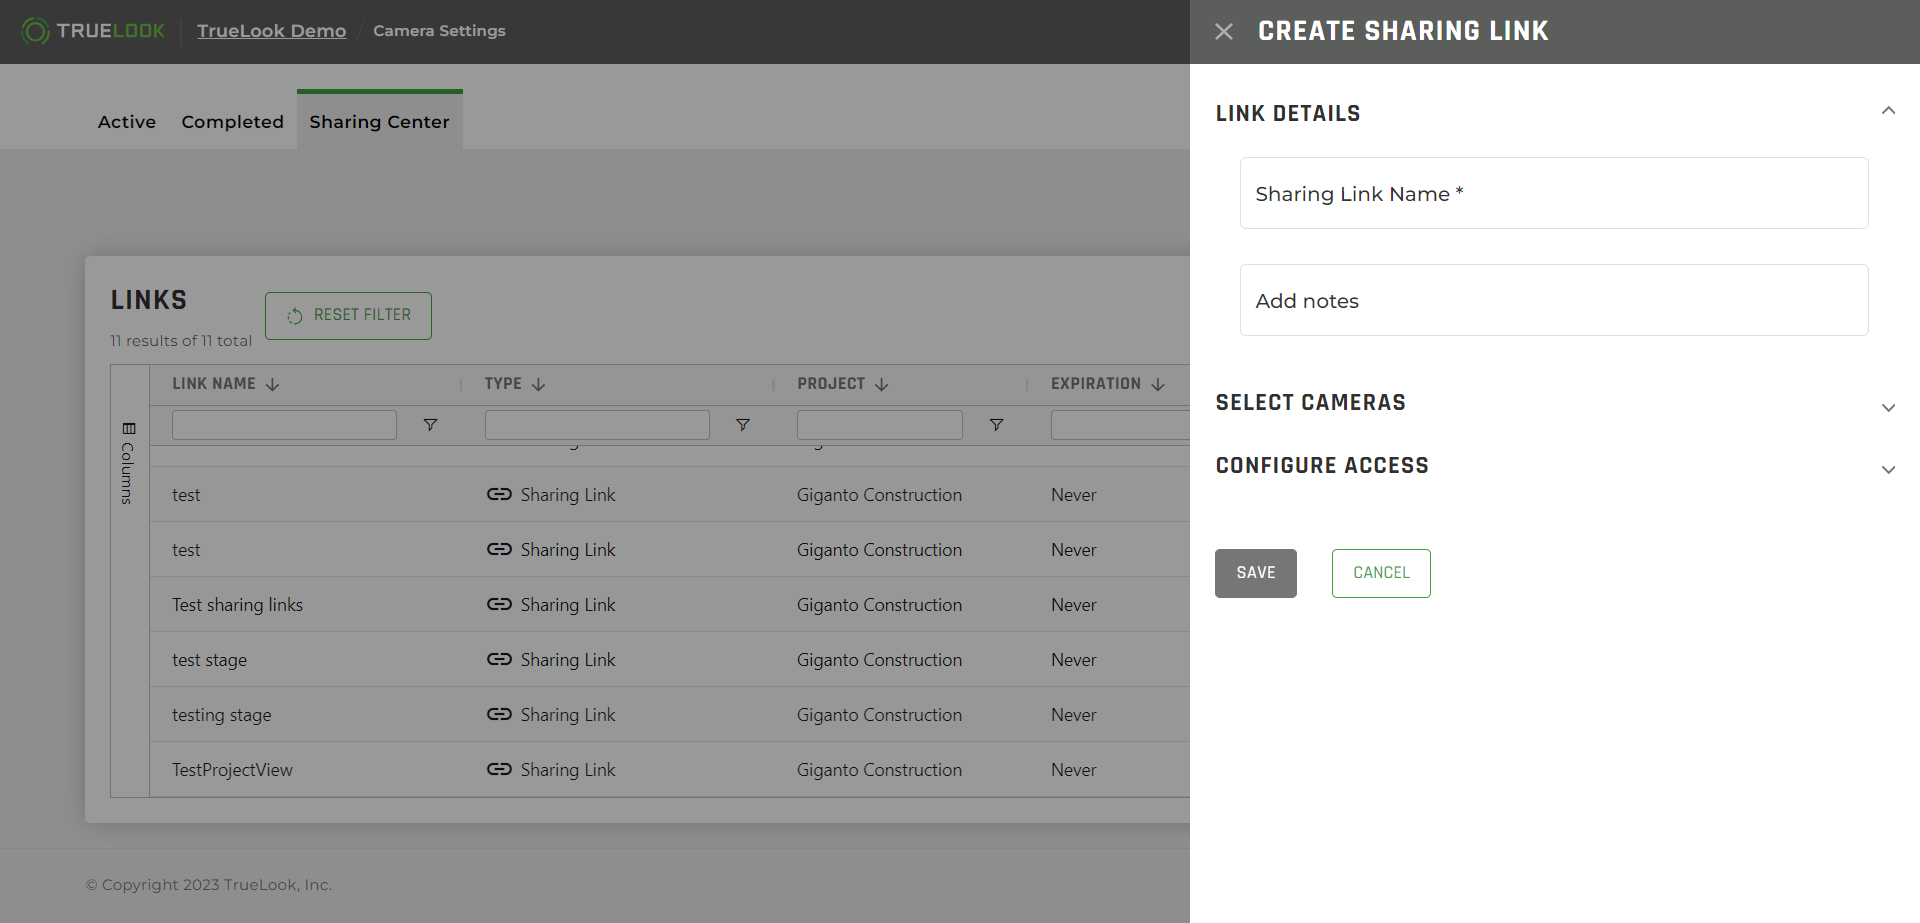
The mandatory fields are:
- Sharing Link Name
- Select Cameras: Requires at least one camera (which can be any active, completed, or offline camera).
- Camera View: Select from the drop-down.
- Camera Interaction: Select camera interaction type (e.g., none, presets only, or full access).
- Expiration: Select from drop-down.
- Time Lapses: Toggle on to share time-lapses.
- Photo Albums: Toggle on to share photo albums.
Link Details Section
Names are required for sharing links but adding notes is optional.
Select Cameras Section
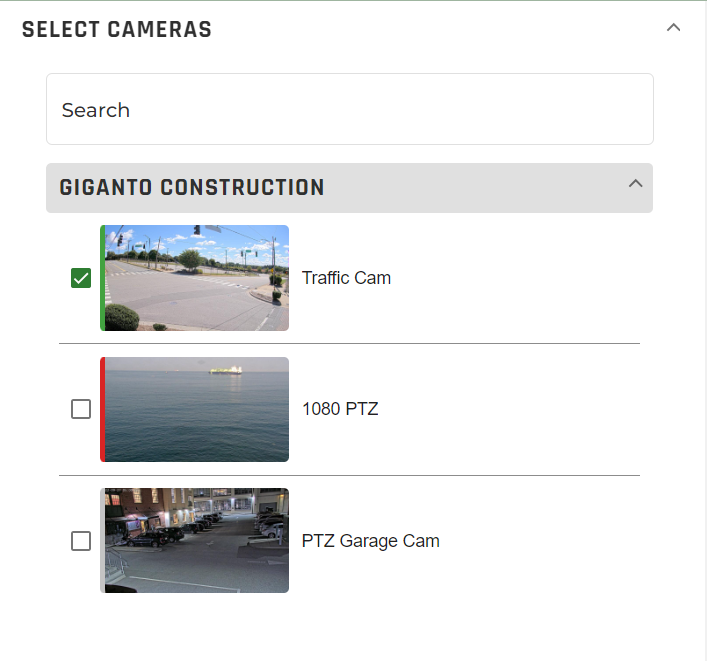
Enter at least three characters to search for a camera or project name. Projects will be listed alphabetically in the rows below the Select Cameras section. You can use the arrow next to the project name to select specific cameras in that project. Click the checkbox next to the camera thumbnail to include that camera in the sharing link.
Each camera thumbnail has a status bar on the left side:
- Green = Active/Enabled
- Red = Offline
- Gray = Completed
Configure Access Section
- Camera View: Select from the drop-down.
- Camera Interaction: Select camera interaction type (e.g., none, presets only, or full access).
- Expiration: Select from drop-down.
- Time Lapses: Toggle on to share time-lapses.
- Photo Albums: Toggle on to share photo albums.
A sharing link will expire at 11:59 PM on the day you set it to expire. When you select multiple cameras/projects, an information icon will appear with the message: “Sharing Links with multiple cameras or projects located in different time zones will expire at 11:59 PM EST time.”
When finished, click Save. The following confirmation message displays and the sharing link is created.

Available Option
You can disable or enable access for a sharing link by using the toggle option in the Available column.
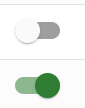
When you disable access for a sharing link, the toggle will appear gray and a confirmation message will display.
When you activate access for a sharing link, the toggle will appear in the green state and a confirmation message will display.
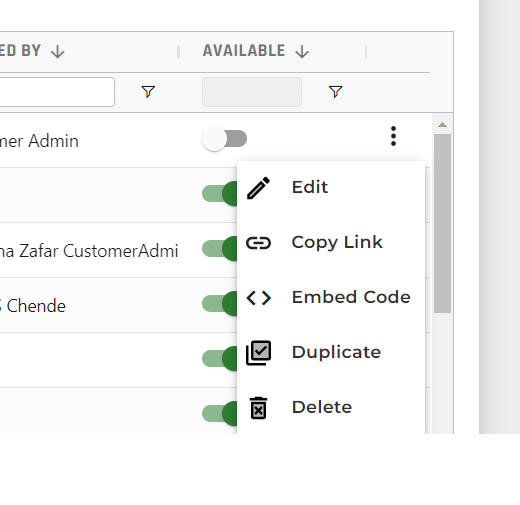
Ellipses Options
You can click the ellipses option from the Sharing Center table and view the options: Edit, Copy Link, Embed Code, Duplicate, and Delete.
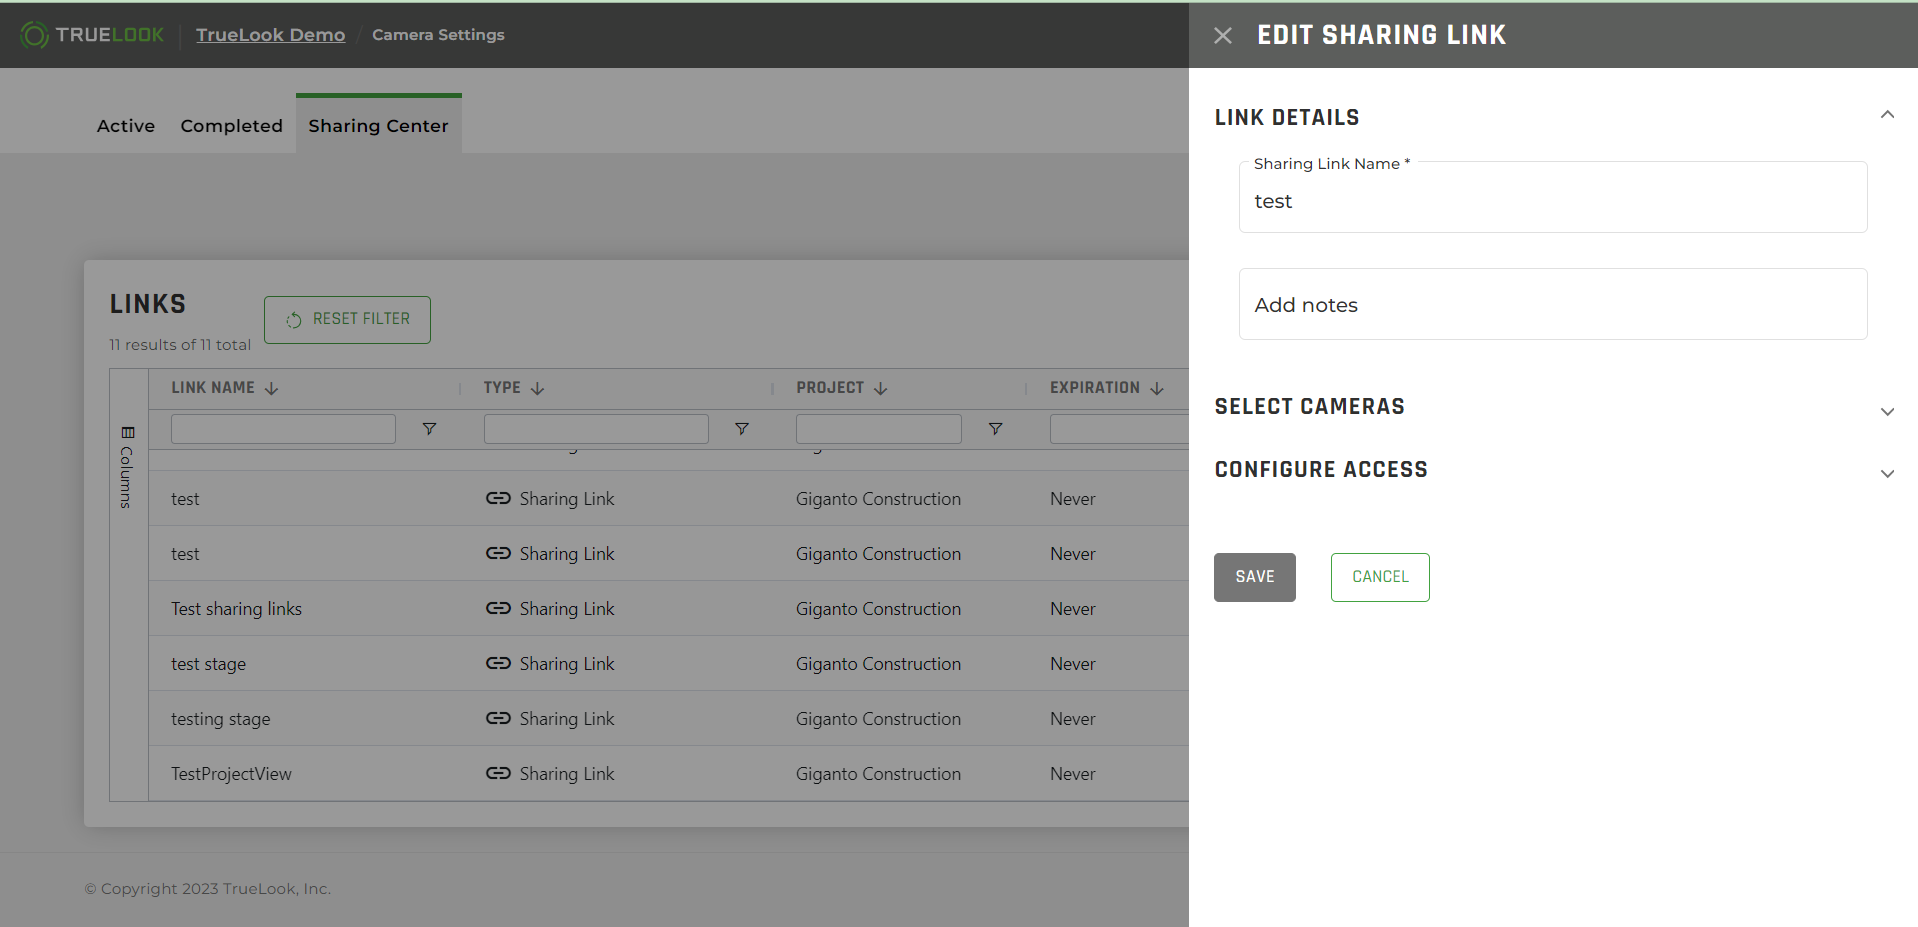
Edit
To edit an existing sharing link, click Edit and the Edit Sharing Link drawer will open with all of the previously selected fields. You can then make and save changes.
Copy
You can copy the link to share with your intended visitors. When you click Copy Link, a confirmation message will appear when the link has been copied to your clipboard.
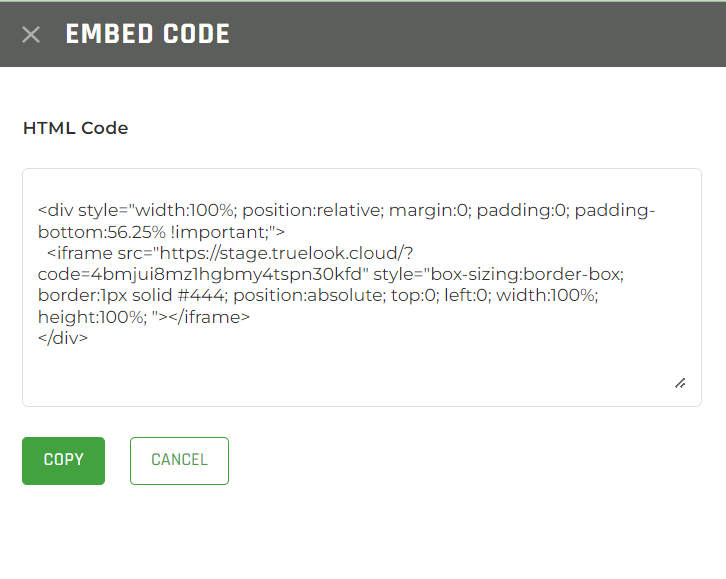
Embed Code
You can embed your camera view into your website to share the camera with visitors. Simply choose the sharing link you’d like to embed and click Copy to copy the displayed HTML code to your clipboard. Then, give the HTML code to your web developer to add to your website.
NOTE: The code will work as long as the sharing link is active. If the sharing link is deleted, disabled, or expired, your embed code will no longer work.
Duplicate
You can duplicate an existing sharing link to replicate the information. When you click on the Duplicate option, a drawer will open with the previously selected fields. You have the ability to edit the information and save the sharing link.
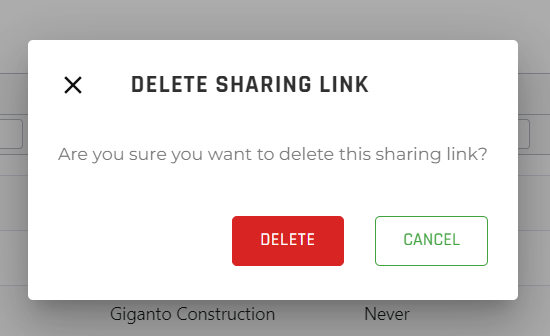
Delete
When a sharing link is no longer needed, it can be deleted. A pop-up message will appear to confirm your decision. When you select Delete, the sharing link will no longer be accessible and will no longer display on the Sharing Center table.
NOTE: there is also an option to disable a sharing link if you’d like to temporarily revoke access.
A confirmation message will appear when the sharing link has been deleted.
Linked Cameras
In Camera Settings, the Linked Cameras tab lets you add additional cameras from other organizations onto your dashboard. This lets you view all the TrueLook cameras you have access to from one location instead of requiring different logins for each of the individual camera accounts.
To do this, you will first need the sharing links for the cameras you want to link. See Sharing Links to view detailed information on how to create a camera sharing link.
Link a New Camera
Click the Linked Cameras tab. The Linked Cameras page displays.
Click Link New Camera. The Link New Camera window displays.
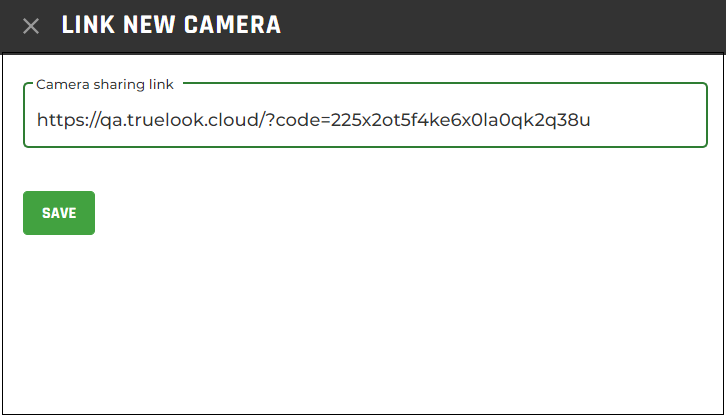
Enter a camera sharing link and click Save. Your new camera displays in the Linked Cameras tab.

NOTE: A linked camera cannot be controlled like a camera in your actual customer account but will appear in your dashboard. To unlink the camera (remove it from your dashboard) click Unlink.