Jobsite Surveillance combines our Intelligent Motion Alerts with human verification to provide you with complete, trusted jobsite protection.
With Jobsite Surveillance, motion alerts captured by your cameras will be verified by a trained professional before you are alerted. No more alerts in the middle of the night because a raccoon has climbed your fence.
In the event of a verified alert, our trained professionals will contact you within minutes, giving you the option to request emergency services or dismiss the alert. If you do not respond to the agent, emergency services will automatically be sent to your site.
Jobsite Surveillance Cameras
Currently, Jobsite Surveillance is only available on our Fixed 4K IR and 1080p IR PTZ cameras.
Configuring Jobsite Surveillance
From within the Camera Settings page find the Project that you have the Jobsite Surveillance enabled on. From here, click the Configure button.

Note: TrueLook must enable Jobsite Surveillance on your project first. If you need assistance with Jobsite Surveillance, please contact TrueLook support at support@truelook.com or call 833.878.3566, option #2.
This will open a four-step wizard where you will configure the options that make up this Jobsite Surveillance Workflow.
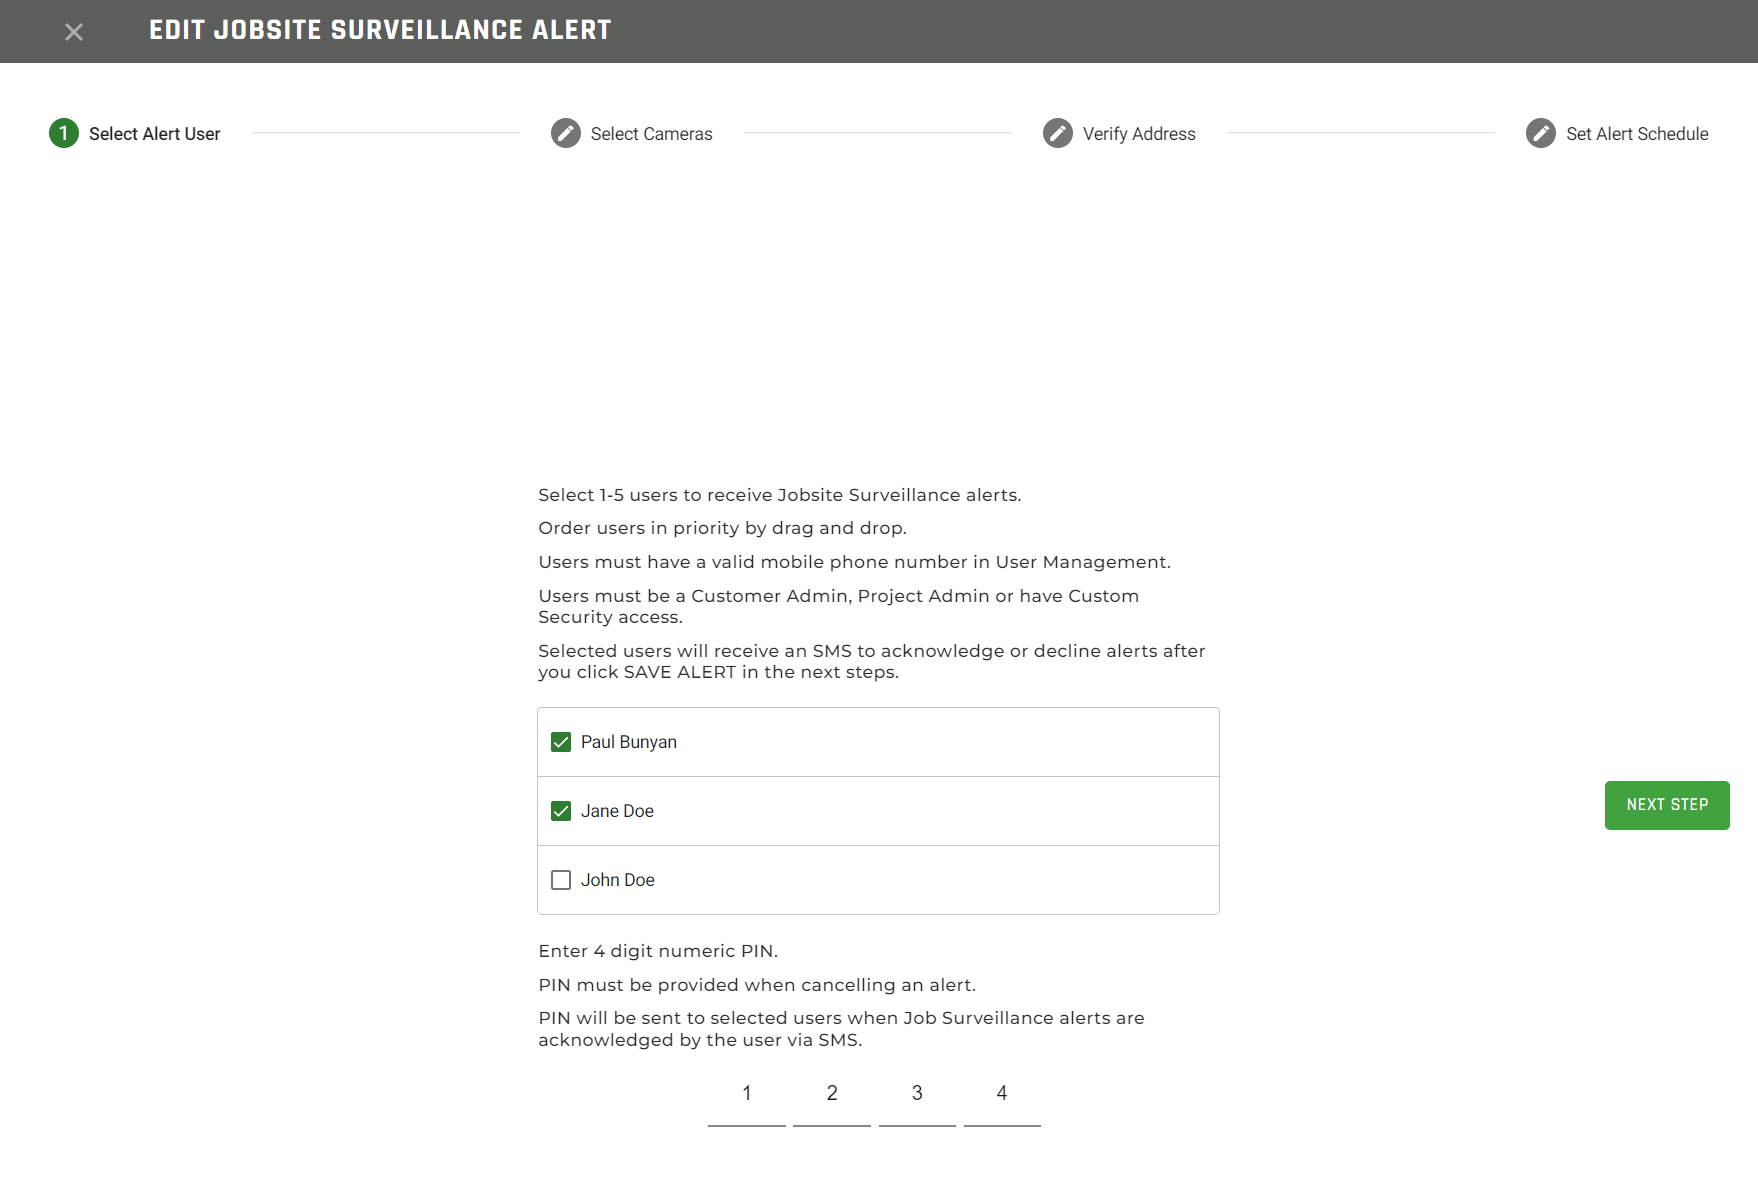
Select Alert Users – Step 1
The first step in the Workflow is to select the authorized person or persons who should be contacted if activity is detected on your jobsite by checking the box in front of their name. All users that meet the alert user criteria will be listed in the selection box.
To be selectable a user must have:
- Access to Security Recordings in the system
- A valid US Cell Phone number
- The ability to receive SMS messages on their cell phone
Note: Customer Administrators and Project Administrators have the correct security setting by default. Custom roles can be created to have access to Security Recordings also.
If you do not see a user you expected to see, look at their account in User Management.
Note: The system will send a text message to the user. Each text message expires in 1 hour so if you are trying to verify the phone number ensure the user that is selected is ready/available to Acknowledge the message.
Order the Alert Users
When multiple users are selected the agent will contact the first user on the list first. If there is no answer, they will move on to the next user, and so on.
Note: You are limited to 5 users max for this selection.
To order people on the list, you can drag the users into the order you would like (e.g. Paul Bunyan, the site manager, will now be the first to be contacted).
4 Digit PIN Code
In order for the agent to confirm your identification for text and phone calls, there is a 4-digit PIN code that is used. Enter a 4-digit PIN at the bottom of the page
Note: Once they have accepted the assignment each user will receive a text message with the PIN code that they can reference when contacted.
Once you have selected and ordered alert users and entered a pin code, click the Next Step button.
Select Cameras – Step 2
On the Select Cameras step, you should have one or more cameras to select from (all must be Fixed 4K IR or 1080p IR PTZ cameras).
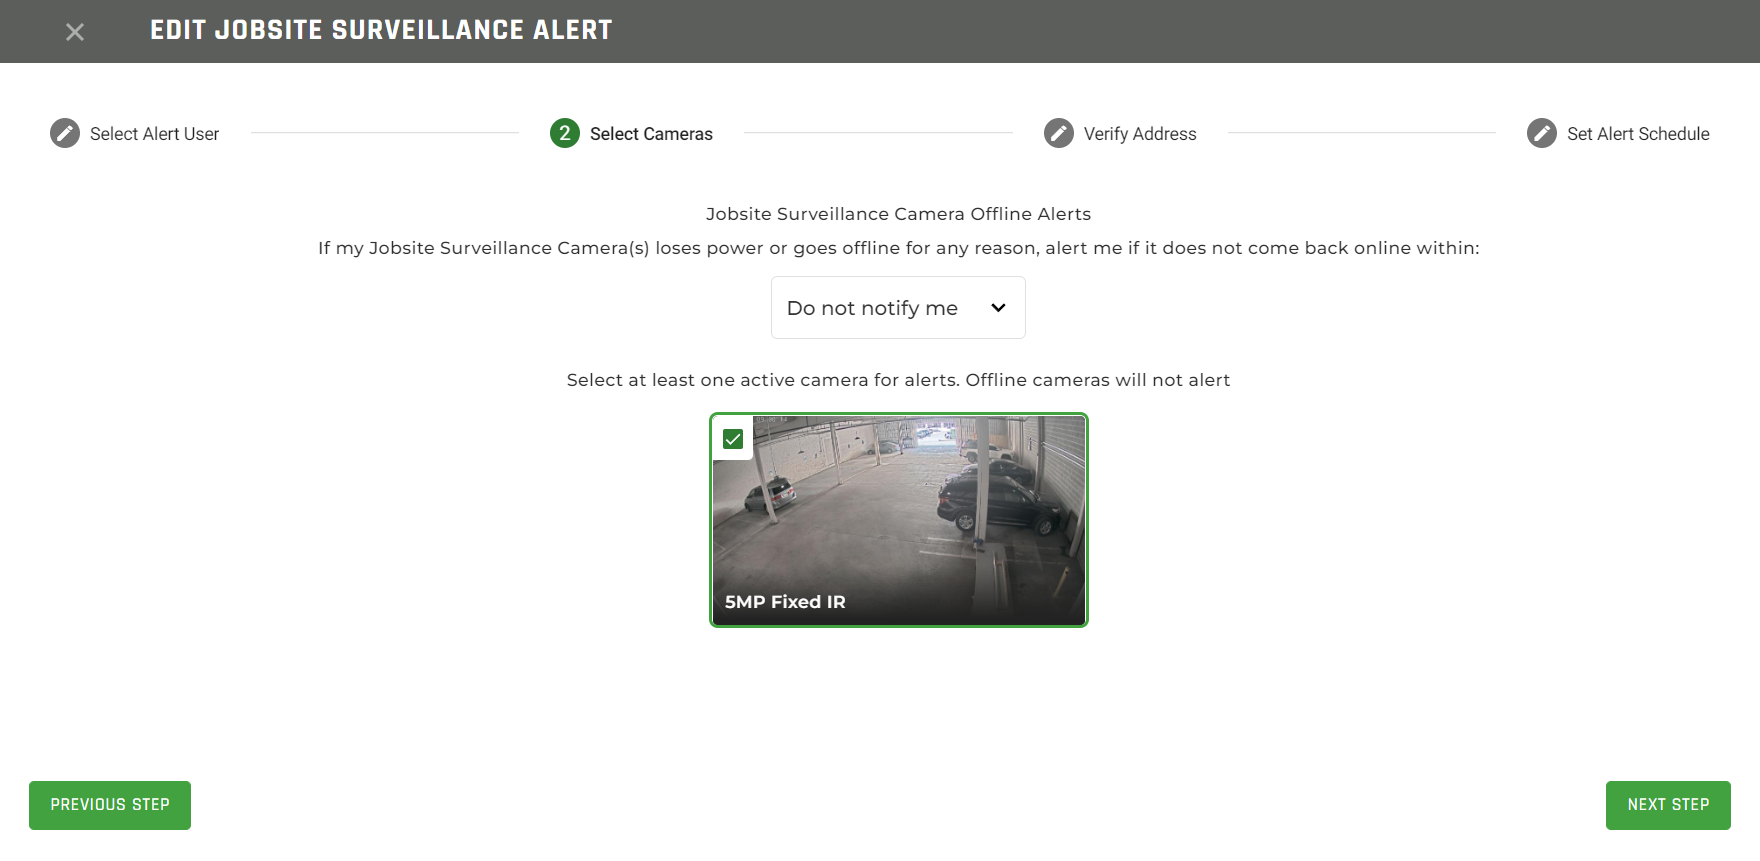
Click the checkbox on the cameras that you will use to trigger this Workflow.
The cameras should have been placed and oriented correctly.
NOTE: If you are unsure of the placement or orientation of your cameras for Jobsite Surveillance, contact TrueLook support at support@truelook.com or 833.878.3566, option #2.
Jobsite Surveillance Camera Offline Alerts
Also on this step, you may also select if you would like Jobsite Surveillance Camera Offline Alerts. If you choose to get text messages when your Jobsite Surveillance Camera goes offline you can select one of the following choices:
- Do not notify me
- 5 minutes
- 15 minutes
- 30 minutes
- 1 hour
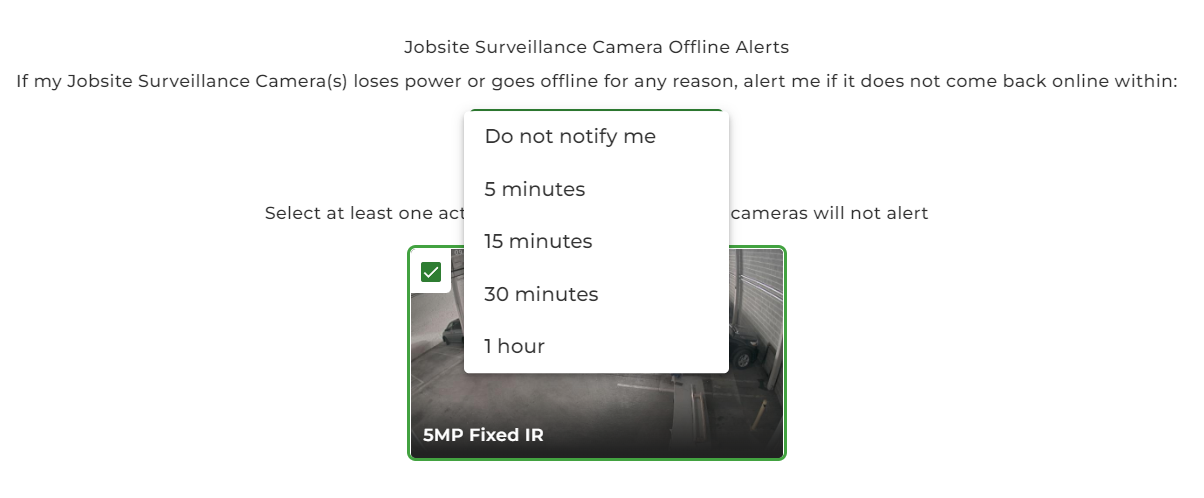
These times indicate how long the camera should be offline before you are notified (e.g. If you select 15 minutes, your camera will have to be offline for at least 15 minutes in order for you to receive an alert).
Note: The Offline Alerts for Jobsite Surveillance Cameras are different from the regular Offline Alerts. In fact, you can have both in operation at the same time.
Once you have selected at least one camera and have selected a Jobsite Surveillance Camera Offline Alert option, click the Next Step button.
Verify Address – Step 3
The next step in the wizard is to verify the correct address for the jobsite. Specifically, this should be the precise address you want the police to respond to in the event of an alert.
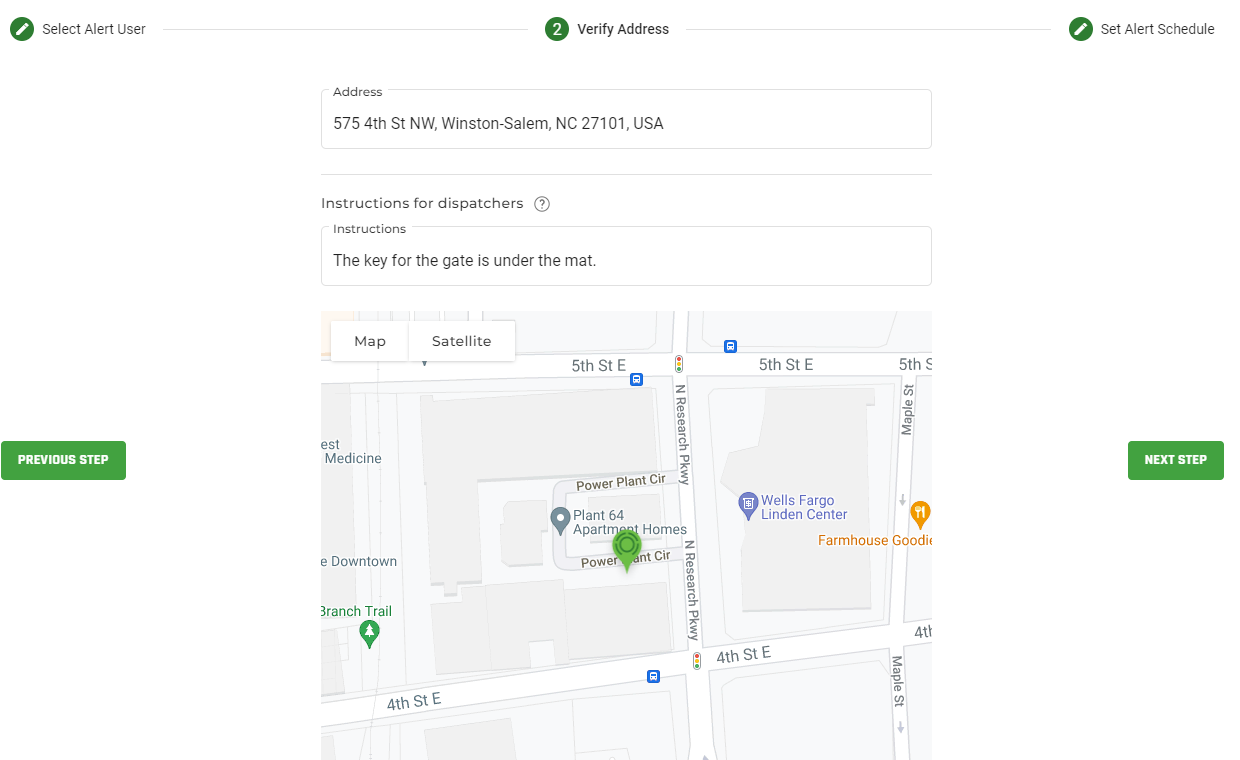
Enter the street address into the Address field and Google will automatically start auto-populating the address with their database.
Instructions for Dispatchers
This field is required and it’s used to give the dispatchers any additional information to share with the police. Examples are gate or alarm codes or instructions specific to the jobsite.
Refining the Map
The map will center directly on the address you enter in the address field. To refine the precise location you can drag the map around. Use the area outside of the marker, do not try to move the marker. The address will automatically update with your map location.
Once you have set the address for your Jobsite and entered any instructions for the dispatcher, click the Next Step button.
Set Alert Schedule – Step 4
The next step in the wizard is to define the hours you want alerts to be sent. Our cameras perceive motion as an alert so for an alarm you only want to have this enabled for when motion is not expected on your jobsite. Setting the hours to well outside of working hours is recommended.
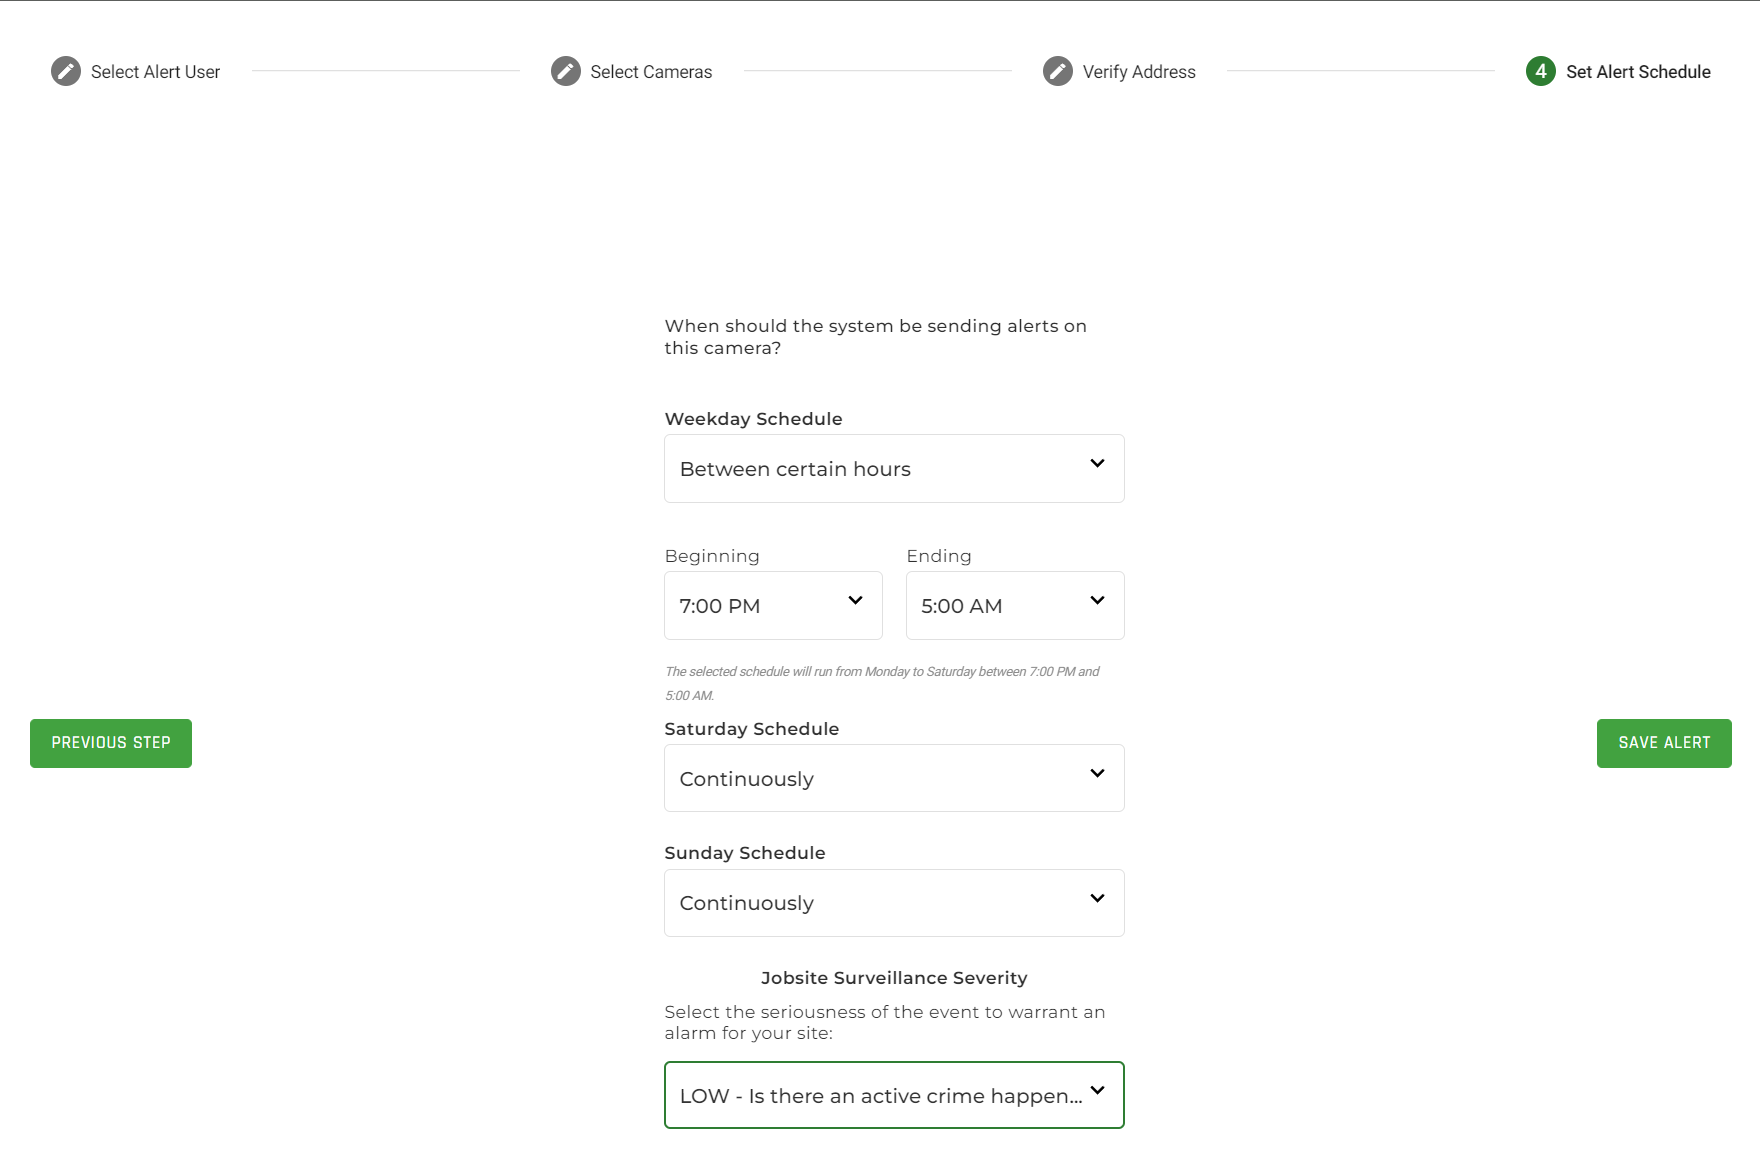
Once you have finished entering your alert schedule, click Save Alert and you will be taken to the Alert Summary page.

If there are any elements that still need to be configured, the “DRAFT – Alerts will not be sent!” message will appear. These will need to be addressed before any alerts will be active. Draft alerts will not trigger any alerts to the Noonlight Agent for verification.
Pausing Jobsite Surveillance
Sometimes you may not want Jobsite Surveillance to send alerts during a scheduled monitoring period. For instance, you normally have monitoring all day on Saturday and Sunday, and it is Saturday morning and you would like to Pause the monitoring for today so you and your team can finish up some work from the previous week.
TrueLook has added a Pause feature to allow you to do just that.
From within the Camera Settings page find the Project Banner that you have the Jobsite Surveillance enabled. From here, click on the Pause button.
Note: If you need assistance with Jobsite Surveillance, please contact TrueLook support at support@truelook.com or call 833.878.3566, option #2.
This will open the Pause Surveillance drawer where you will configure the Pause options
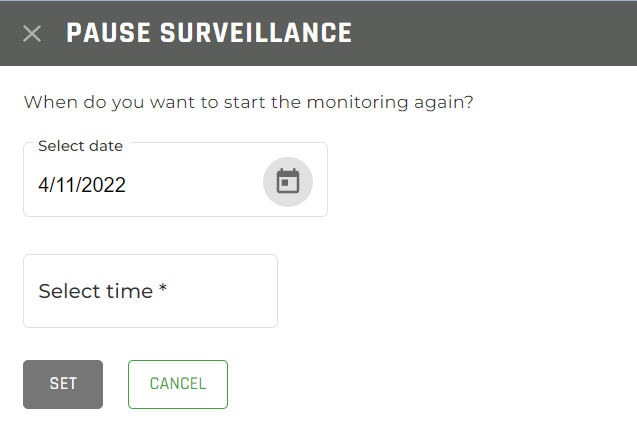
From here you can select when you would like the monitoring to begin again.
Select the Date
First select a date for monitoring to begin again.

You can select up to 6 days in the future. By default, the current is selected.
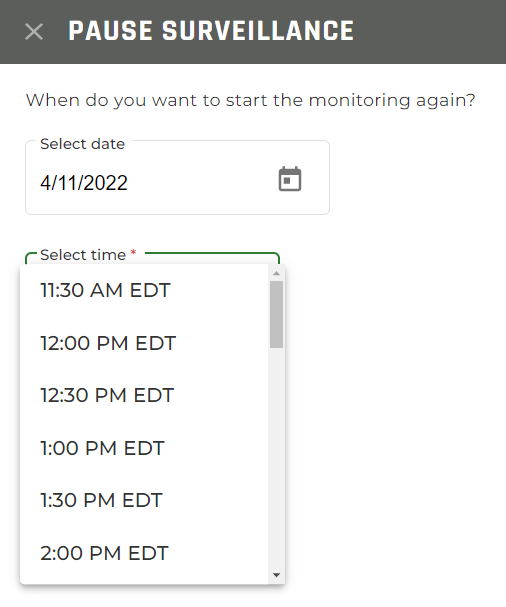
Next, you will select the time that the monitoring will begin again.
Select the Time
If you select today as the date then you will only be shown times from the current time to the end of the day in 30-minute increments. If you select any other date you will show times for the whole day (Midnight to Midnight).
Once you have selected a date and time, click the Set button and your Pause will be in place.
Then once the date and time you set for the Pause occurs, the monitoring will return to its regular schedule.
Resume Monitoring Schedule
If your team has finished early and you wish to Resume the regular monitoring schedule, click on the Resume button and your monitoring schedule will immediately Resume.